Gluten-free banana nut bread muffins are more than just a treat; they’re a connection to my childhood. I still remember sitting at the kitchen table, legs swinging, as the smell of bananas and toasted walnuts filled the room. Back then, the concept of gluten-free baking wasn’t even on the radar. Muffins were simple, comforting, and loaded with flavor. Today, recreating that feeling — without the gluten — has become a small mission of mine.
There’s something magical about a muffin that’s soft, moist, and packed with the perfect banana-nut balance. When you nail a batch of gluten-free banana nut bread muffins, you’re not just making a snack — you’re baking a memory. The best part? You don’t have to sacrifice flavor or texture to meet your dietary needs.
In this guide, I’ll show you how to create gluten-free banana nut bread muffins that are bakery-worthy. From choosing the right gluten-free flour blend to mastering the perfect rise, every tip here is built to help you bake like a pro. Whether you’re new to gluten-free baking or simply looking for a better recipe, you’re in the right place.
Looking for inspiration? Try our gluten-free chocolate cupcakes for another sweet treat.
Table of Contents
Table of Contents
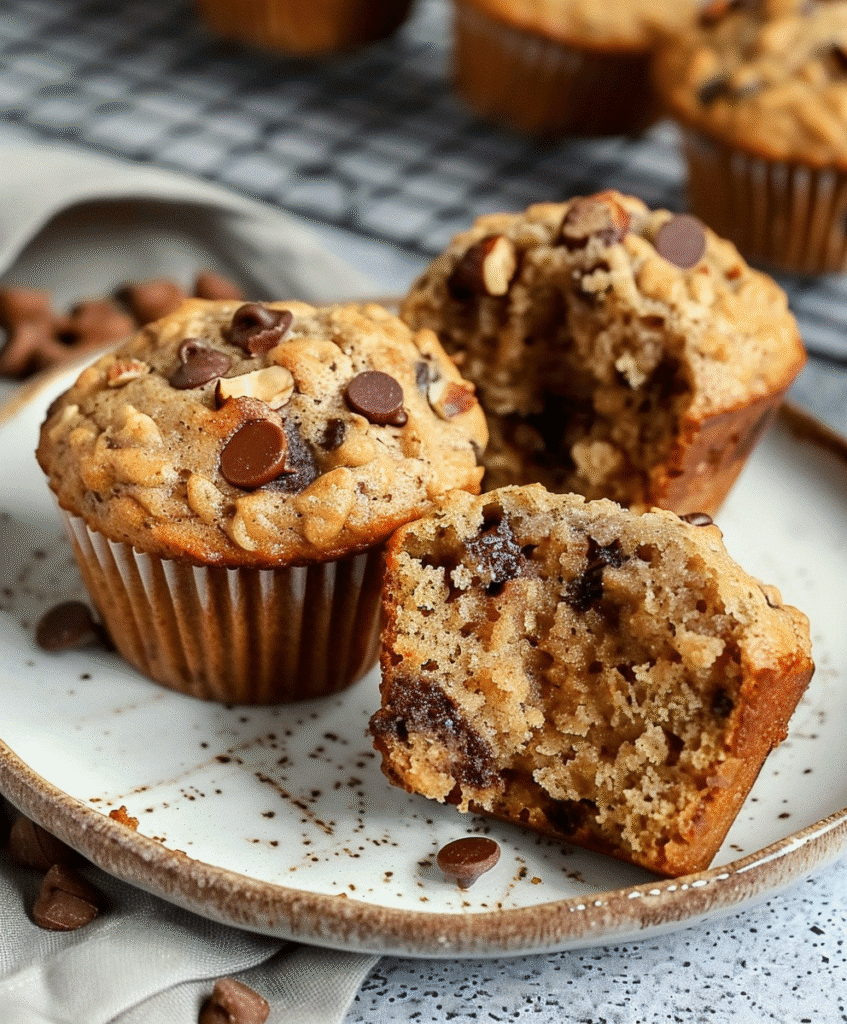
What Makes the Perfect Gluten-Free Banana Nut Bread Muffins?
What Gluten-Free Means for Muffins
When baking muffins, gluten usually plays the quiet role of the structure builder. Without it, there’s a risk of baked goods turning crumbly, dense, or downright disappointing. That’s why creating amazing gluten-free banana nut bread muffins requires a careful balance of ingredients and techniques. But don’t worry — with a few tricks up your sleeve, you can make muffins that rival any traditional recipe.
In gluten-free baking, structure comes from alternative sources. Flours blended with starches and binding agents like xanthan gum recreate the elasticity gluten provides. Meanwhile, moist ingredients like ripe bananas help create the tender crumb we all love. Proper leavening, like the right amount of baking soda, ensures your muffins rise to a fluffy, bakery-style dome.
In short, gluten-free doesn’t mean flavor-free. With the right steps, your gluten-free banana nut bread muffins can be every bit as soft, moist, and satisfying as any you remember from childhood — just safer for everyone at your table.
Key Ingredients: Bananas, Nuts, and Flour
Let’s break down the powerhouse trio that makes these muffins unforgettable:
- Bananas: The heart and soul of the muffin. Bananas not only provide natural sweetness but also ensure that moist, melt-in-your-mouth texture. The riper they are, the better — look for peels freckled with brown spots.
- Nuts: Walnuts are the classic choice, offering a slightly bitter crunch that complements the bananas’ sweetness. Pecans are a softer, sweeter alternative if you’re feeling adventurous. Toast the nuts lightly before folding them in for deeper flavor.
- Gluten-Free Flour: Not all gluten-free flours are created equal. Choose a high-quality, all-purpose gluten-free blend that includes xanthan gum. The xanthan gum helps mimic the chewiness and structure usually provided by gluten. This step is essential for achieving muffins that aren’t just edible — they’re crave-worthy.
When you combine these three ingredients thoughtfully, you’re well on your way to baking the kind of gluten-free banana nut bread muffins that leave everyone asking for seconds.
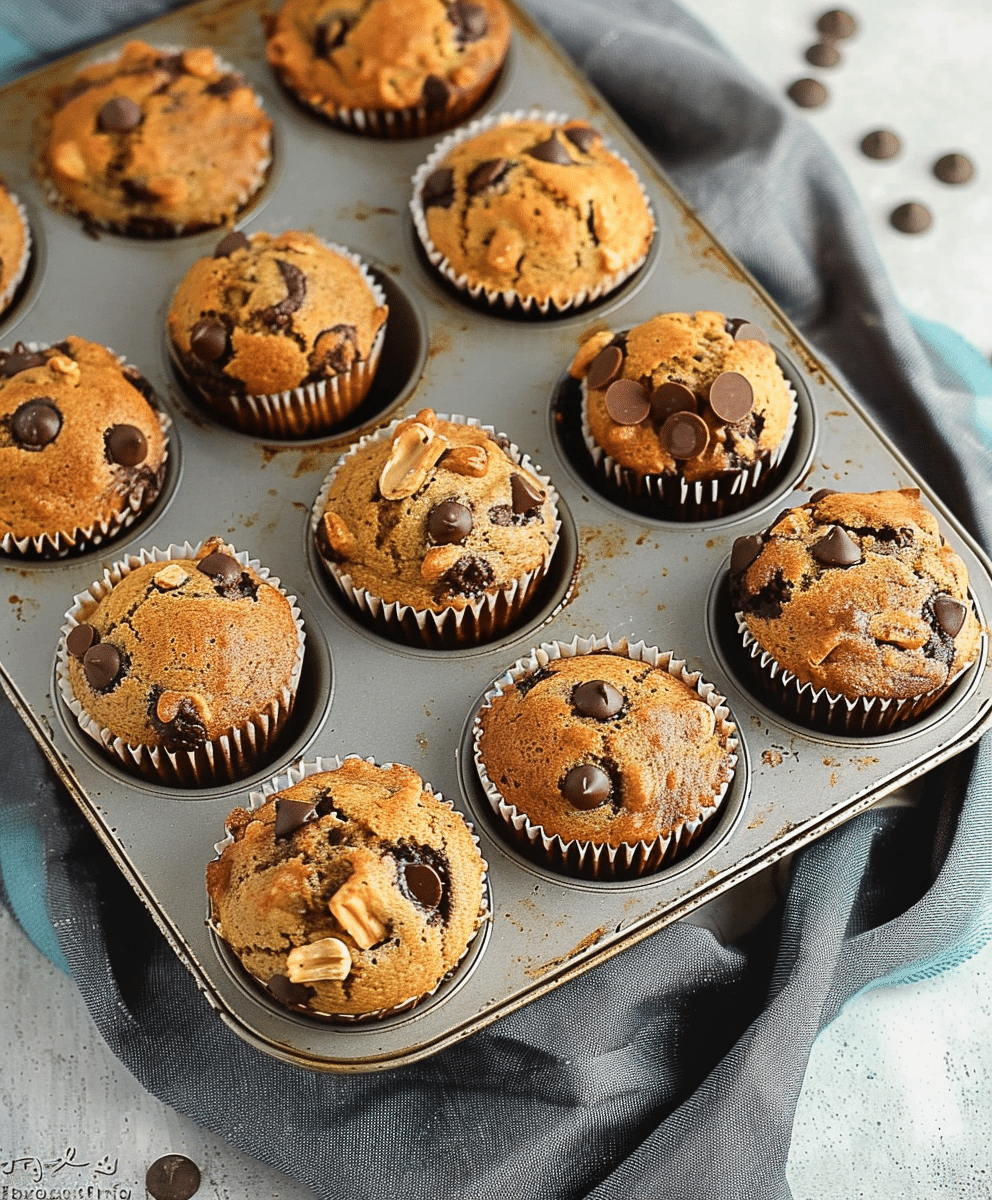
Gluten-Free Banana Nut Bread Muffins: The Ultimate Guide for Moist, Fluffy Results
Ingredients
Method
- 1. Preheat oven to 350°F (175°C). Line a muffin tin with cupcake liners or spray with gluten-free non-stick spray.
- 2. In a large bowl, mash the bananas until smooth.
- 3. Stir in the baking soda and let the mixture sit for 1–2 minutes.
- 4. Add the melted butter and stir until combined.
- 5. Mix in the sugar, cinnamon, salt, vanilla, and whisked eggs.
- 6. Gently fold in the gluten-free flour until just combined — do not overmix.
- 7. Stir in chopped walnuts and optional chocolate chips or blueberries.
- 8. Scoop the batter into the prepared muffin tin, filling each cup about 3/4 full.
- 9. Bake for 15–20 minutes, or until a toothpick inserted into the center comes out clean.
- 10. Let muffins cool in the pan for 5 minutes, then transfer to a wire rack to cool completely.
- 11. Enjoy fresh or store once fully cooled!
Nutrition
Notes
Tried this recipe?
Let us know how it was!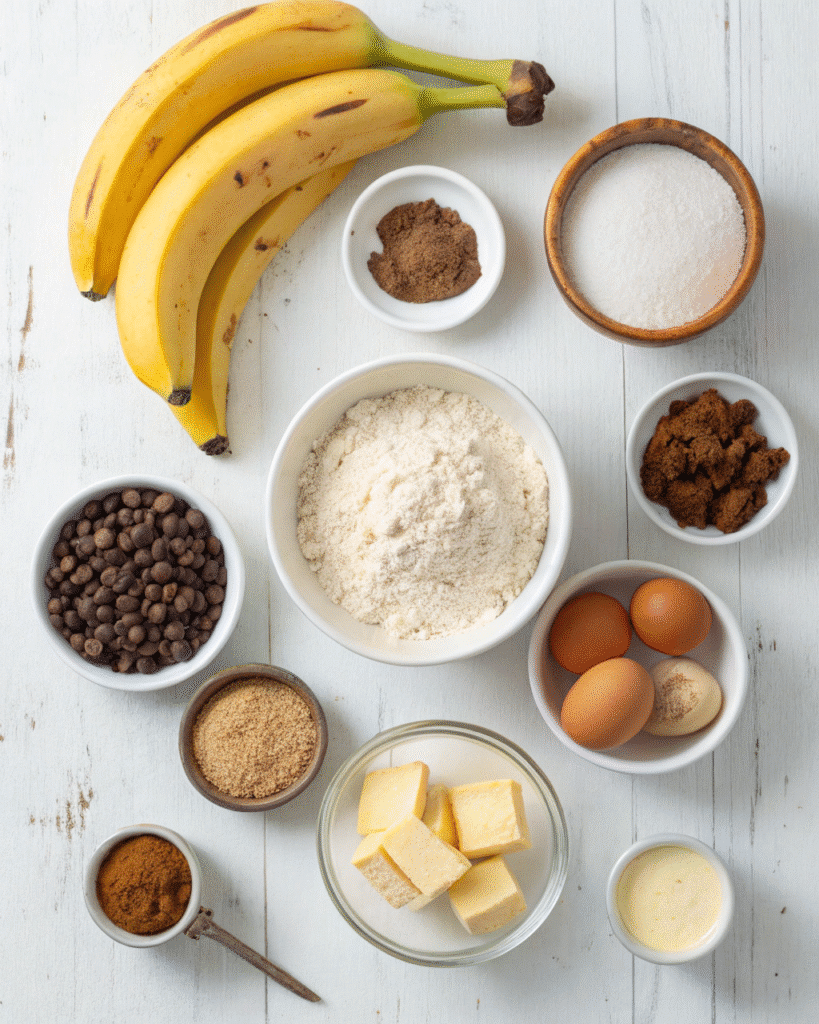
Choosing the Best Gluten-Free Flour for Muffins
Top Recommended Gluten-Free Flour Blends
The backbone of any good gluten-free banana nut bread muffins recipe is the flour. Choosing the wrong one can leave you with muffins that are gummy, dry, or oddly textured. But the right flour? It transforms your batter into tender, fluffy perfection.
Look for a high-quality gluten-free all-purpose flour blend. These blends typically combine rice flour, potato starch, tapioca starch, and most importantly, xanthan gum. Without xanthan gum, your muffins may fall apart or feel overly crumbly.
Recommended brands for best results:
- Pillsbury Gluten-Free All-Purpose Flour: Known for its balanced texture and neutral taste.
- King Arthur Measure for Measure Flour: Reliable for consistent results.
- Bob’s Red Mill 1-to-1 Baking Flour: Includes xanthan gum and works well in muffin recipes.
It’s crucial to avoid single-ingredient flours like almond or coconut flour for this recipe. They behave very differently and don’t deliver the soft texture needed for moist muffins.
If you’re unsure whether your blend contains xanthan gum, check the label. Adding extra xanthan gum to a mix that already contains it can lead to tough, gummy muffins — exactly what we’re trying to avoid.
Why Xanthan Gum Is a Game Changer
Think of xanthan gum as the secret ingredient that holds everything together. In traditional baking, gluten traps air and gives baked goods their chewy structure. In gluten-free baking, xanthan gum steps in to replicate that magic.
Here’s what xanthan gum does:
- Structure: It helps trap the air created by leavening agents, allowing your muffins to rise beautifully.
- Texture: It prevents the muffins from crumbling apart, giving them a soft, cohesive crumb.
- Moisture Retention: It helps lock in moisture, keeping your muffins tender longer.
Without xanthan gum or a similar binder, your gluten-free banana nut bread muffins may fall flat — both literally and figuratively.
Don’t miss our gluten-free pancake recipe — perfect for easy mornings with the same gluten-free flour blends.
The Step-by-Step Recipe for Gluten-Free Banana Nut Bread Muffins
Ingredient List and Substitutions
Before diving into the mixing bowl, let’s line up the essentials for perfect gluten-free banana nut bread muffins. The right ingredients make all the difference between dry, dense muffins and soft, moist bites of heaven.
Main Ingredients:
- 3 ripe bananas (mashed)
- 1 teaspoon baking soda
- 1/3 cup melted butter (for dairy-free: use coconut oil or vegan butter)
- 1/2 cup granulated sugar (or coconut sugar for refined sugar-free)
- 1/2 teaspoon ground cinnamon
- 1/8 teaspoon salt
- 1 teaspoon pure vanilla extract
- 2 large eggs (for egg-free: use Bob’s Red Mill egg replacer)
- 1 1/2 cups gluten-free all-purpose flour (with xanthan gum included)
- 1/2 cup chopped walnuts (or pecans)
- Optional: 1/2 cup gluten-free chocolate chips for a sweet twist
Pro Tip: Always spoon and level your gluten-free flour — never scoop directly from the bag — to avoid packing in too much flour and drying out your muffins.
Detailed Preparation Steps
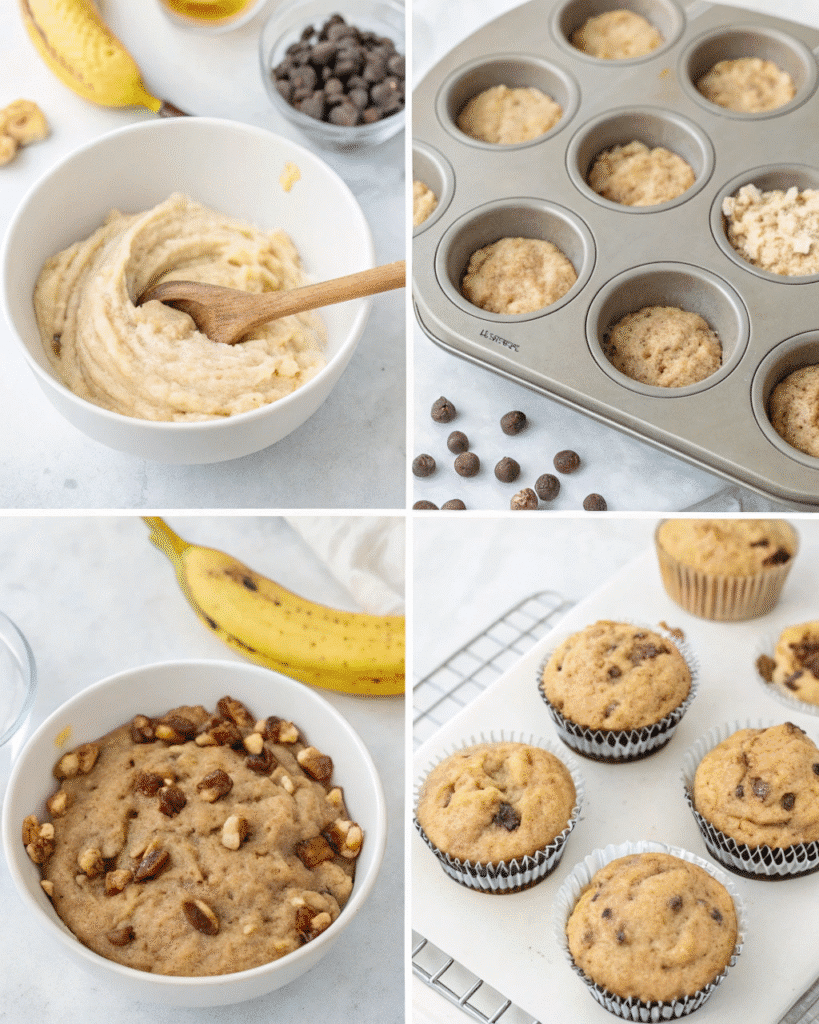
- Preheat your oven to 350°F. Line a muffin tin with cupcake liners or lightly spray with gluten-free non-stick spray.
- Mash the bananas in a large mixing bowl until completely smooth.
- Add baking soda to the bananas and stir. Let the mixture sit for 1–2 minutes to activate. This step is critical for ensuring your muffins rise beautifully.
- Mix in melted butter (or coconut oil if dairy-free) until well combined.
- Add sugar, salt, cinnamon, vanilla, and whisked eggs. Stir until the mixture is fully integrated and smooth.
- Fold in the gluten-free flour carefully, mixing just until incorporated. Overmixing can make your muffins tough.
- Gently fold in chopped nuts (and chocolate chips if using) to distribute evenly throughout the batter.
- Scoop the batter into the prepared muffin tin, filling each cup about 3/4 full for a nicely rounded top.
- Bake for 15–20 minutes, or until a toothpick inserted into the center of a muffin comes out clean. Keep an eye on them — ovens can vary!
- Cool the muffins in the pan for 5 minutes, then transfer to a wire rack to cool completely.
Serving Tip: Enjoy your gluten-free banana nut bread muffins warm with a pat of dairy-free butter or a drizzle of honey for an extra treat.
Tips for Perfect Muffins Every Time
How to Keep Muffins Moist and Tender
When baking gluten-free banana nut bread muffins, moisture makes the difference between a bakery-style treat and a disappointing snack. Without gluten, muffins can dry out faster, but a few smart techniques can lock in that irresistible tenderness.
To ensure your gluten-free banana nut bread muffins stay moist:
- Use overripe bananas: Bananas with plenty of brown spots provide the moisture and natural sweetness these muffins need.
- Don’t overmix the batter: Overmixing can make gluten-free banana nut bread muffins dense and tough.
- Measure flour properly: Always spoon and level your gluten-free flour to avoid using too much and drying out your muffins.
- Mix in moisture-holding ingredients: Nuts, chocolate chips, or berries not only boost flavor but also help retain moisture in your gluten-free banana nut bread muffins.
Another pro tip: allow your gluten-free banana nut bread muffins to cool completely before storing. If sealed while still warm, condensation forms, making the muffins sticky rather than tender.
Secrets to Achieving a Beautiful Rise
No one wants flat gluten-free banana nut bread muffins. A proper rise ensures your muffins look just as good as they taste. Here’s how to make it happen:
- Activate baking soda properly: Mixing baking soda with mashed bananas and letting it sit for a couple of minutes helps lift your gluten-free banana nut bread muffins.
- Avoid opening the oven early: Disrupting the baking environment can cause gluten-free banana nut bread muffins to collapse.
- Fill muffin cups adequately: Fill them about 3/4 of the way to create beautifully domed gluten-free banana nut bread muffins.
- Bake at the right temperature: A steady 350°F helps develop a consistent rise without drying out the muffins.
Perfecting gluten-free banana nut bread muffins takes attention to detail, but with these steps, you’ll get fluffy, moist, and delicious muffins every time.
Discover great ideas like our easy 4-ingredient gluten-free biscuits for quick, flaky gluten-free baking.
Common Mistakes and How to Avoid Them
Why Your Gluten-Free Banana Nut Bread Muffins Didn’t Rise
There’s nothing more frustrating than pulling flat gluten-free banana nut bread muffins out of the oven. A poor rise usually points to a few key missteps. Understanding these can make all the difference.
Common reasons for flat muffins:
- Inactive leavening agents: Baking soda is critical for lift. Always check that your baking soda is fresh and properly activated by mixing it with the mashed bananas.
- Overmixed batter: Overmixing deflates the air bubbles you need for a good rise. Stir gently to keep the structure of your gluten-free banana nut bread muffins light and airy.
- Opening the oven too soon: Peek too early, and the temperature drop can collapse your muffins before they set.
- Incorrect oven temperature: Too hot or too cool can mess with your rise. Always preheat to 350°F and bake consistently.
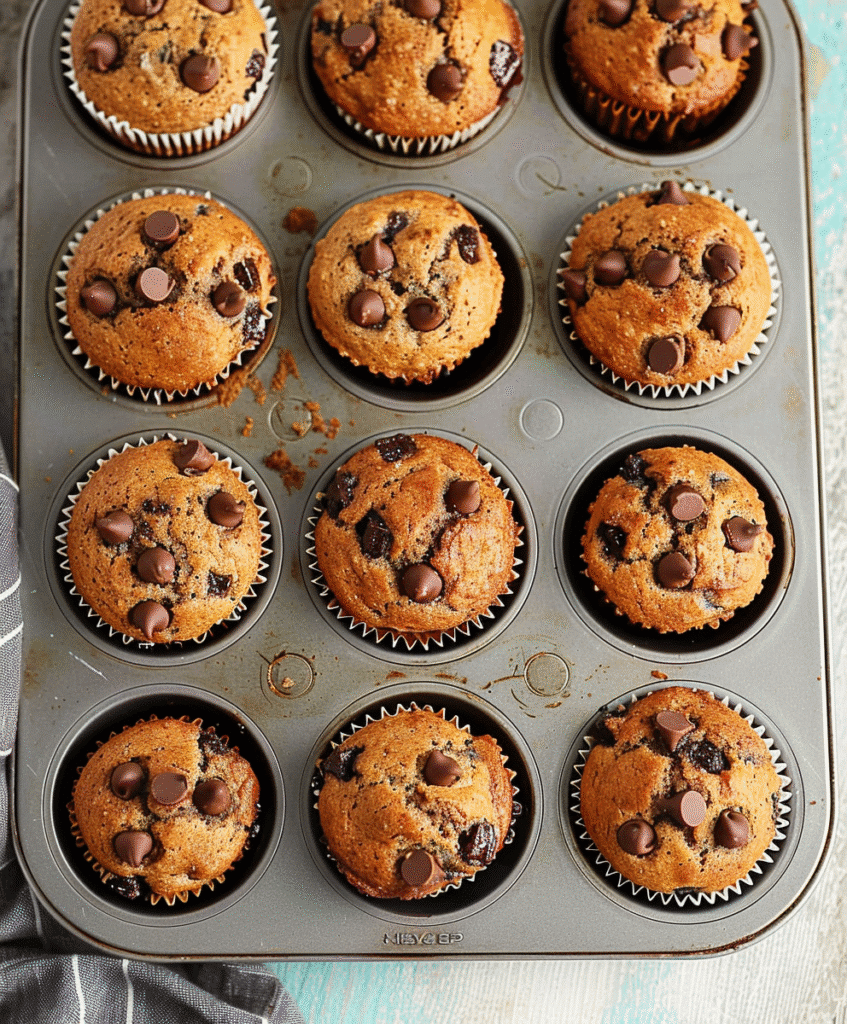
Perfecting the rise ensures that your gluten-free banana nut bread muffins look as good as they taste — tall, fluffy, and ready to impress.
Overcoming Gummy Texture
A gummy muffin isn’t pleasant — it’s heavy, sticky, and hard to enjoy. This problem can pop up in gluten-free banana nut bread muffins if you aren’t careful with the flour and moisture balance.
What causes gummy muffins?:
- Too much xanthan gum: If your flour blend already includes xanthan gum, avoid adding more. Extra xanthan makes gluten-free banana nut bread muffins overly dense and sticky.
- Wrong flour blend: Not all gluten-free flours behave the same. Stick to a tested, high-quality all-purpose gluten-free flour that already balances starches and binders.
- Incorrect flour measuring: Scooping directly from the bag packs in extra flour. Instead, spoon the flour into your measuring cup and level it off for accuracy.
Lastly, don’t underestimate the importance of cooling. Letting your gluten-free banana nut bread muffins cool fully prevents a gummy texture caused by trapped steam.
Following these tips ensures your muffins have that perfect crumb — moist but never gummy, tender but never dense.
Variations and Add-Ins to Try
Adding Chocolate Chips, Blueberries, and More
One of the best things about gluten-free banana nut bread muffins is how versatile they are. Once you master the base recipe, you can easily switch things up to match your cravings or the season.
Here are a few mix-in ideas to elevate your gluten-free banana nut bread muffins:
- Chocolate Chips: Semi-sweet or dark chocolate chips add a decadent sweetness. Make sure they’re certified gluten-free.
- Blueberries: Fresh or frozen blueberries give your muffins a juicy pop. Toss them in a little gluten-free flour before folding them into the batter to prevent sinking.
- Dried Fruit: Chopped dates, cranberries, or raisins add chewiness and extra flavor.
- Coconut Flakes: For a tropical twist, add a handful of unsweetened coconut flakes.
- Peanut Butter Swirl: Drop small dollops of peanut butter on top before baking for a delicious swirl effect.
These additions keep the muffins exciting and help you customize every batch of gluten-free banana nut bread muffins to your liking.
Dairy-Free and Egg-Free Options
Dietary restrictions? No problem. It’s easy to adapt gluten-free banana nut bread muffins to be dairy-free and egg-free without sacrificing taste or texture.
Dairy-Free Swaps:
- Replace butter with melted coconut oil or a dairy-free margarine like Smart Balance.
- Use dairy-free chocolate chips if adding mix-ins.
Egg-Free Swaps:
- Use a commercial egg replacer like Bob’s Red Mill Egg Replacer.
- Alternatively, a flax egg (1 tablespoon ground flaxseed + 3 tablespoons water) can work well.
These adjustments ensure your gluten-free banana nut bread muffins are accessible for more diets without losing their tender crumb and rich flavor.
Check out our gluten-free German chocolate cake for a decadent variation if you’re feeling extra indulgent.
How to Store, Freeze, and Reheat Muffins
Best Storage Practices
Once you’ve baked the perfect batch of gluten-free banana nut bread muffins, knowing how to store them properly is key to maintaining their freshness and texture.
Here’s how to keep your muffins tasting bakery-fresh:
- Cool completely before storing: Warm muffins trap steam and turn soggy if sealed too soon.
- Store in an airtight container: Place a paper towel on the bottom of the container, add the muffins, and top with another paper towel to absorb excess moisture.
- Room temperature storage: If you plan to eat them within 2 days, keep your gluten-free banana nut bread muffins at room temperature.
- Refrigerate for longer storage: For up to a week, store in the refrigerator, but bring to room temp or warm before serving to revive their softness.
Proper storage ensures your gluten-free banana nut bread muffins stay moist, flavorful, and ready whenever you crave one.
Freezing for Long-Term Freshness
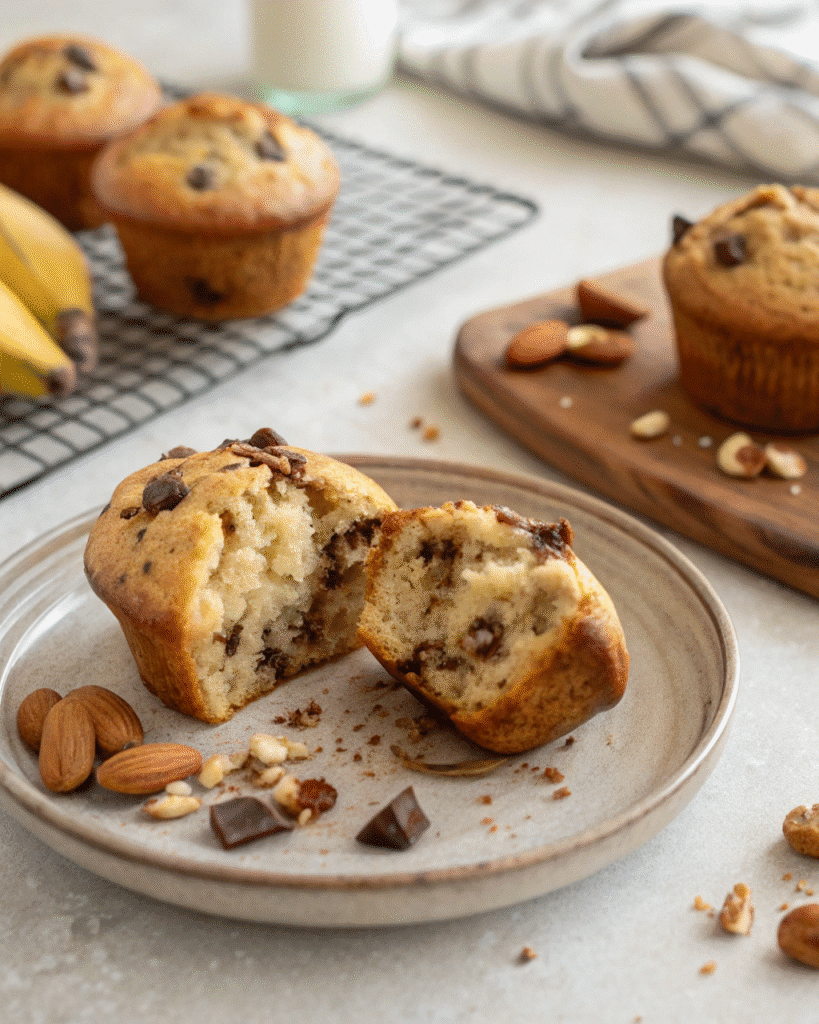
Want to enjoy your muffins weeks later? Freezing is the way to go — and it’s easier than you think.
How to freeze gluten-free banana nut bread muffins:
- Cool completely: Always cool muffins first to prevent ice crystals.
- Flash freeze: Place muffins on a baking sheet in the freezer for 15 minutes so they don’t stick together.
- Transfer to freezer bags: Use a freezer-safe bag, squeeze out extra air, and label with the date.
- Double-bag for extra protection: To prevent freezer burn, place your muffin bag inside a second freezer-safe bag.
Reheating Tips:
- Microwave: Heat one muffin for 30–45 seconds.
- Oven: Wrap muffins in foil and bake at 350°F for about 10 minutes.
Frozen and reheated properly, your gluten-free banana nut bread muffins will taste just as fresh as the day you baked them.
Conclusion and Final Tips
Mastering the perfect gluten-free banana nut bread muffins isn’t just about following a recipe — it’s about understanding the small details that make all the difference. From selecting the right gluten-free flour blend to perfecting the rise and ensuring a moist crumb, every step builds toward bakery-quality results you can be proud of.
The best part? With simple swaps, you can easily make these muffins dairy-free or egg-free, opening the door to more dietary needs without sacrificing taste or texture. Plus, with the freezing and reheating tips we’ve covered, you can enjoy fresh-tasting muffins any time you crave them.
So the next time you have a few ripe bananas on your counter, you’ll know exactly what to do. Follow this guide, and your gluten-free banana nut bread muffins will be so good that no one will even guess they’re gluten-free.
Don’t miss our gluten-free sourdough bread recipe — a perfect savory companion to your muffin baking days!
Follow us on Facebook & Pinterest for more gluten-free dessert ideas and community fun!
For more delicious gluten-free recipes, visit our website at The Savory Hearth.
Frequently Asked Questions
Which gluten free flour is best for banana bread?
The best flour for making gluten-free banana nut bread muffins is a high-quality gluten-free all-purpose blend that includes xanthan gum. Brands like Pillsbury Gluten-Free Flour or Bob’s Red Mill 1-to-1 Baking Flour are reliable choices. These blends mimic the texture of regular flour, ensuring your muffins come out soft, moist, and perfectly risen without becoming dense or crumbly.
What is the best gluten free flour to use for muffins?
For muffins, consistency and moisture are key. The best gluten-free flour blends for muffins are ones with a balanced mix of rice flour, potato starch, and tapioca flour — and of course, xanthan gum. Using a cup-for-cup gluten-free flour will make your gluten-free banana nut bread muffins tender and fluffy. Always avoid single-ingredient flours like almond or coconut flour, which can drastically change the muffin texture.
Why did my gluten free banana bread not rise?
There are a few reasons your gluten-free banana nut bread muffins might not rise properly:
Inactive baking soda: Always make sure it’s fresh.
Skipping the activation step: Stir baking soda into mashed bananas and let it sit for a minute before adding other ingredients.
Overmixing: Gentle mixing is key to preserving air pockets.
Opening the oven door early: Keep the oven closed for at least 15 minutes to maintain temperature stability.
By carefully following the steps outlined earlier, you’ll avoid flat muffins and enjoy beautifully domed tops every time.
What is the secret to moist muffins?
The secret to moist gluten-free banana nut bread muffins lies in a few simple tricks:
Use very ripe bananas: The more brown spots, the sweeter and moister they’ll be.
Measure flour correctly: Spoon and level instead of scooping.
Avoid overbaking: Check your muffins around the 15-minute mark.
Don’t skip mix-ins: Nuts, chocolate chips, and blueberries add not just flavor but extra moisture retention.
With these tips, your muffins will stay soft and delicious even days after baking

2 thoughts on “Gluten-Free Banana Nut Bread Muffins: The Ultimate Guide for Moist, Fluffy Results”