Gluten-Free Roux wasn’t something I grew up knowing. But I definitely remember standing in my grandma’s tiny kitchen as the smell of warm butter filled the air while she whisked something in a cast iron pot. “It’s the magic base,” she said once, while making her famous chicken and gravy. Years later, when gluten had to leave my diet, I knew I had to find a way back to that flavor and texture I loved as a kid—without the wheat.
In this guide, I’m sharing everything I’ve learned about mastering a gluten-free roux, with all the real-life tweaks, flavor-saving fixes, and practical flour options I wish I’d had from the start. Whether you’re thickening a creamy mac and cheese, a rich soup, or building a comforting holiday gravy, this is your go-to breakdown.
We’ll walk through the best gluten-free flours, mistakes to avoid, and how to get that same silky, buttery texture—just without the gluten. Learn more about other nostalgic comfort food classics like these Gluten-Free S’mores Bars that hit the same heartwarming spot.
Let’s get whisking.
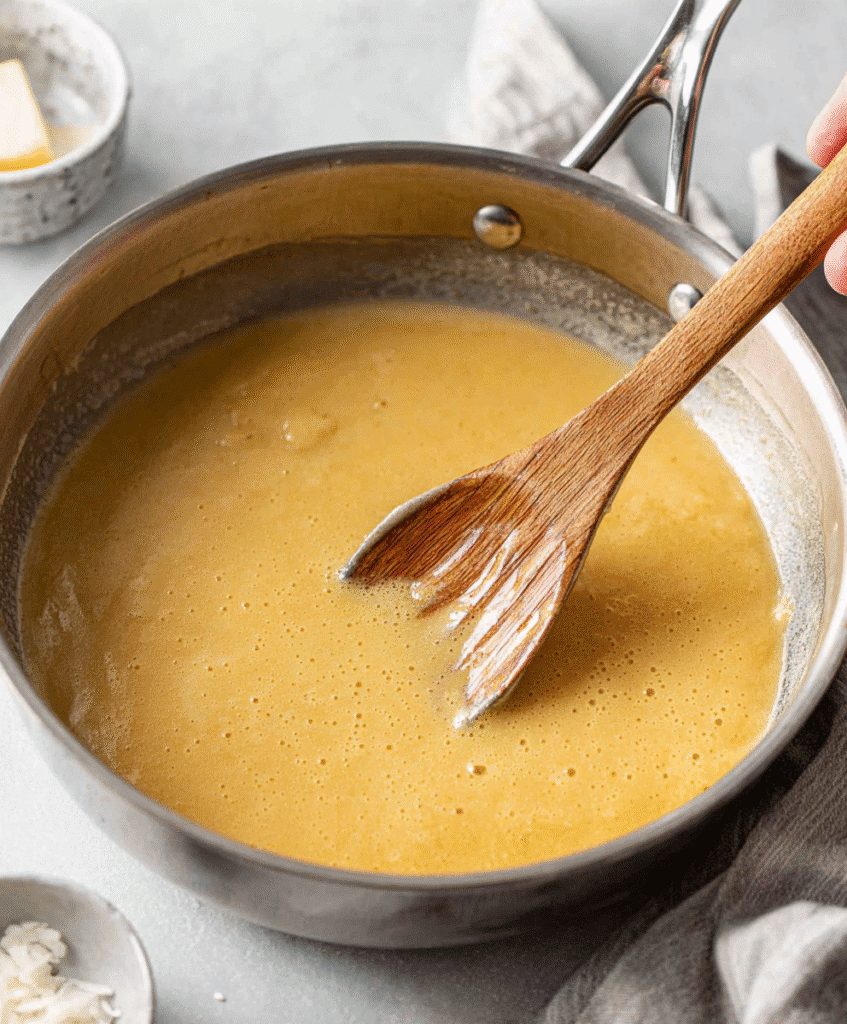
Table of Contents
Table of Contents
Basic Gluten-Free Roux
Ingredients
Equipment
Method
- Melt the butter in a saucepan over medium heat.
- Gradually add the gluten-free flour while whisking constantly.
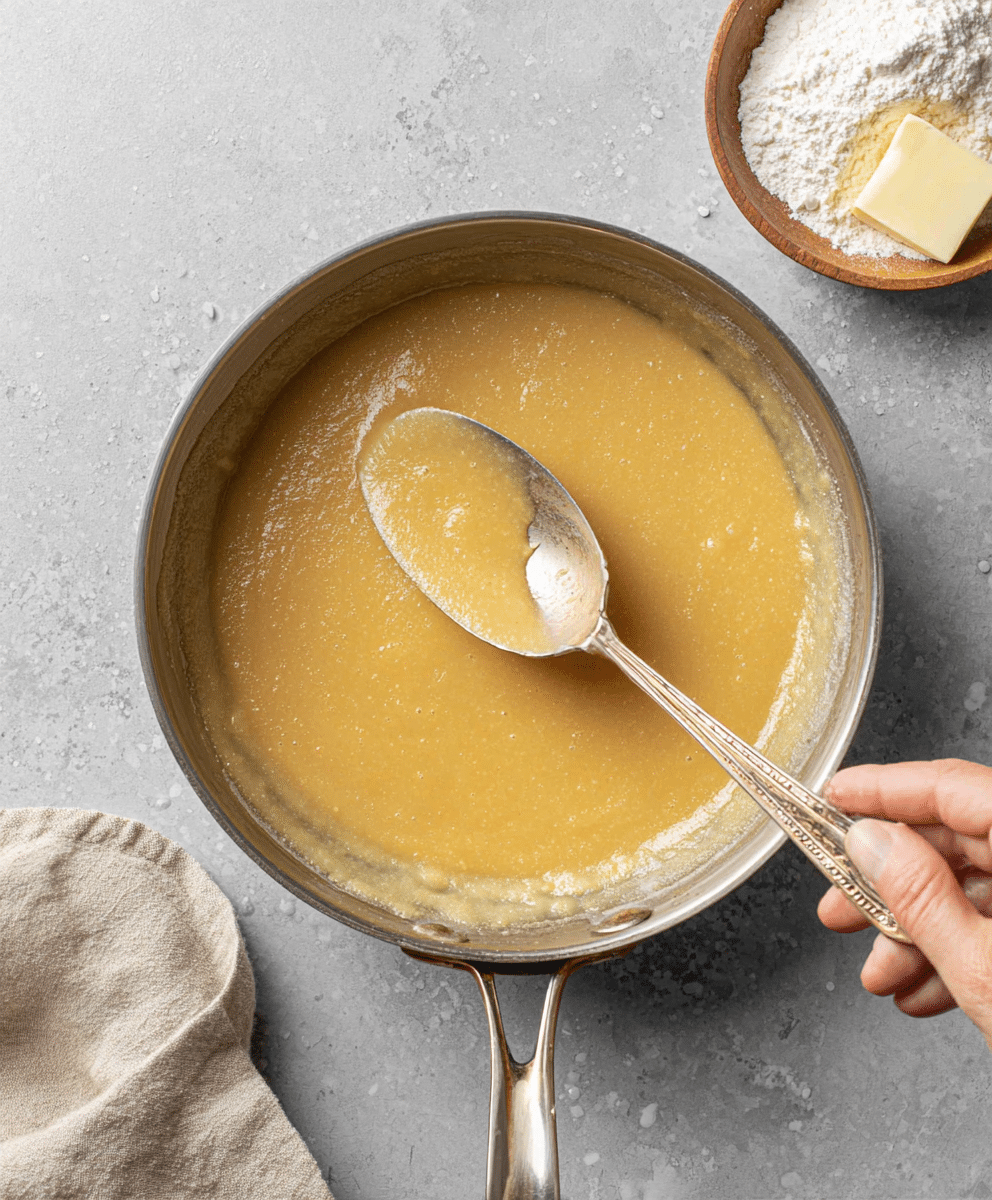
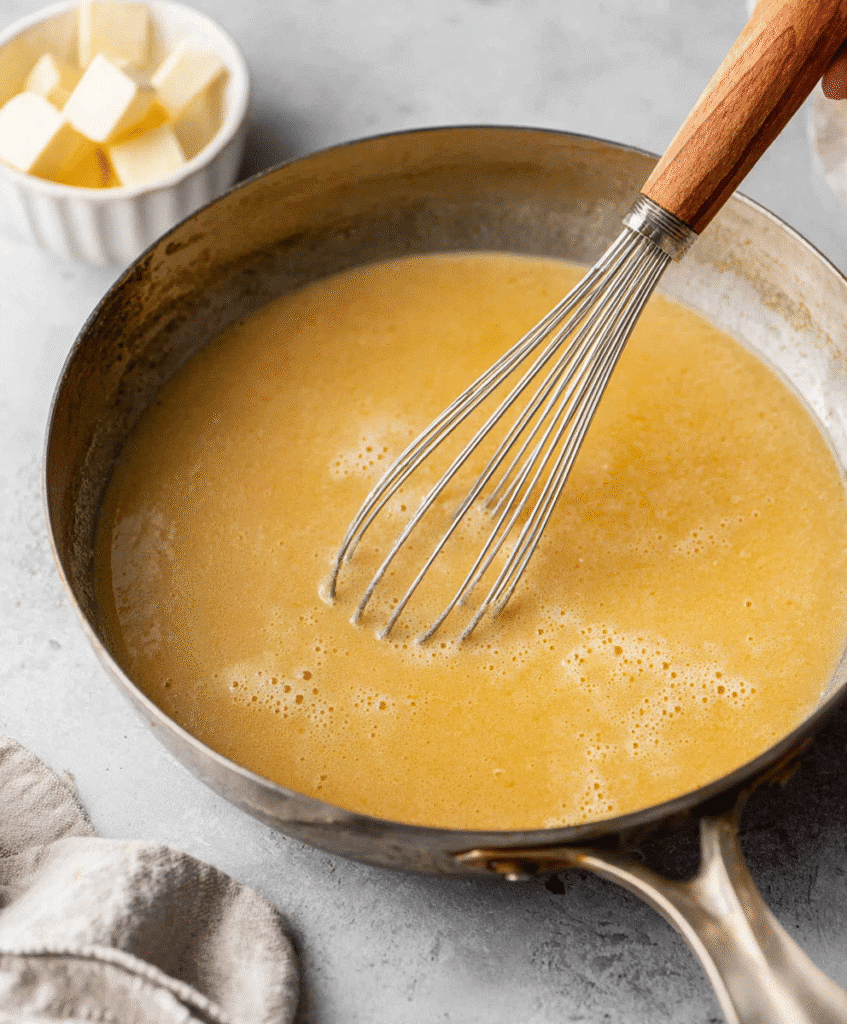
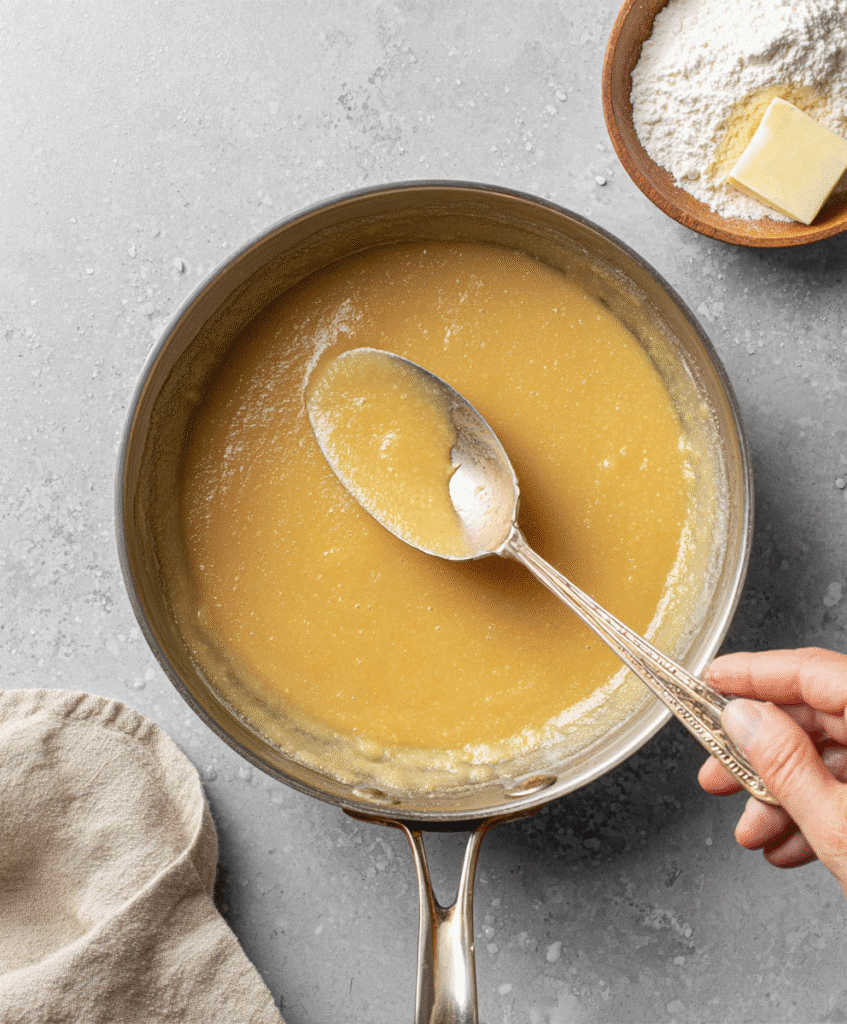
- Whisk for 2–3 minutes until the mixture becomes smooth, golden, and slightly bubbly.
- If desired, slowly add warm liquid to create a sauce while continuing to whisk.
- Cook for 1–2 more minutes until fully thickened.
Nutrition
Notes
- Gluten-Free: You can use any gluten-free flour blend you prefer. There’s no need for a 1:1 or measure-for-measure mix—white rice flour, sweet rice flour, or sorghum all work well.
- To Make Ahead: This gluten-free roux is best when made fresh, but the great news is it only takes about 5 minutes from start to finish!
- To Store: Let the roux cool fully before storing. Place it in an airtight container in the refrigerator for up to 3 days. Reheat gently over low heat while whisking to restore its texture. Note that the consistency may be slightly thicker after refrigeration.
- To Freeze: Freezing is not recommended, as gluten-free flours can separate or change texture after thawing.
Tried this recipe?
Let us know how it was!Understanding the Basics of a Gluten-Free Roux
What is a Roux and Why It’s Important in Cooking
A roux is the base layer of flavor and texture in hundreds of sauces. Traditionally, it’s made by slowly cooking equal parts flour and fat (usually butter) until it thickens and deepens in flavor. It’s what gives cream sauces their body, gravies their velvet, and casseroles their richness.
In classic French and Southern cuisines, roux is sacred—and with good reason. A well-made roux creates sauces that cling beautifully to noodles or coat a spoon with just the right thickness. It’s not flashy. But it’s powerful.
How a Traditional Roux Differs from a Gluten-Free Roux
In a gluten-free roux, we swap the wheat flour for flours that are safe for gluten sensitivity or celiac disease—like rice flour, sorghum, or tapioca. The basic idea is the same: cook the fat and flour together to build a base. But since gluten-free flours behave differently (some absorb more liquid, others thicken faster), the ratios and cook times change a bit.
A traditional roux uses a 1:1 ratio of flour to fat. But with gluten-free flours being heavier and more absorbent, the sweet spot is closer to a 2:3 ratio of flour to butter—that’s 2 tablespoons of flour to every 3 tablespoons of fat.
One thing that doesn’t change? The need to cook off that raw flour taste. Whether you’re using brown rice flour or a gluten-free blend, you’ll want to whisk it over heat for 2–3 minutes until it smells nutty and smooth.
Best Gluten-Free Flours for Roux
Top Flour Alternatives for Making a Gluten-Free Roux
When it comes to creating a smooth, flavorful gluten-free roux, choosing the right flour is essential. Not all gluten-free flours behave the same way—some absorb more liquid, while others thicken faster or offer different textures.
Here are some of the most trusted flours you can use in a gluten-free roux:
| Flour Type | Great For | Why It Works |
|---|---|---|
| White Rice Flour | Sauces, soups, gravies | Neutral flavor, smooth finish |
| Brown Rice Flour | Creamy casseroles, chowders | Slightly nutty, adds depth |
| Tapioca Starch | Glossy sauces, quick thickeners | Light, stretchy consistency |
| Sweet Rice Flour | Cheesy sauces, thick soups | Sticky and elastic, thickens quickly |
| Sorghum Flour | Hearty dishes, gravy bases | Earthy taste, holds up well to heat |
| Gluten-Free Blends | All-purpose thickening | Balanced texture, convenient substitution |
These flours form the foundation of a great gluten-free roux—just be mindful of ratios. Unlike wheat-based roux, which typically uses equal parts fat and flour, gluten-free versions need adjustment. A 2:3 ratio of flour to fat is best for a smoother, less gummy result.
And remember: always cook the flour for at least 2–3 minutes in the fat. This step ensures your gluten-free roux loses that raw, chalky taste and becomes nutty, aromatic, and ready to support whatever dish you’re building.
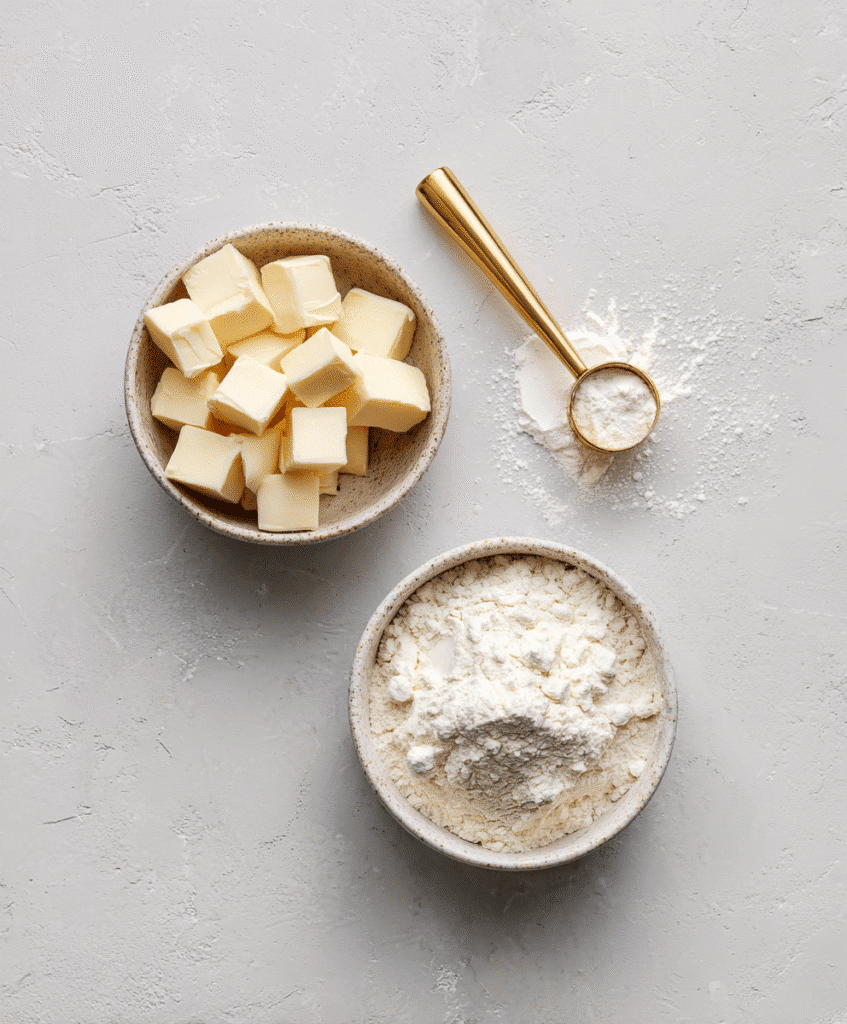
Pros and Cons of Rice Flour, Tapioca, Sorghum & More
Let’s break down what each flour brings to the table when used in a gluten-free roux:
- White Rice Flour: This is a safe go-to. It creates a neutral base with a familiar texture. However, if not fully cooked, it can feel slightly gritty. Whisk well and let it bubble gently to develop flavor.
- Tapioca Starch: Perfect for sauces that need a glossy finish. Think stir-fry glazes or rich gravies. It thickens quickly, but too much can make the texture feel stretchy or gelatinous.
- Sorghum Flour: A bit less common, but fantastic in hearty sauces. It has a mild sweetness and gives your gluten-free roux a creamy body. Be patient—sorghum takes a little longer to cook down.
- Sweet Rice Flour: Often used in Asian cooking, this flour is sticky and binds exceptionally well. It’s ideal for mac and cheese or dishes where you want the sauce to cling. But use sparingly, as it thickens fast and can turn gluey.
- Gluten-Free Blends: These are convenient for beginners or quick cooking. They’re usually made with rice flour, starches, and binders like xanthan gum. Some blends create a silky gluten-free roux, while others may clump—so test a small batch first.
A quick tip from my own kitchen: when making gluten-free cream sauces, I alternate between white rice flour and sweet rice flour depending on the texture I’m after. If I want something closer to a traditional béchamel, white rice flour gives the cleanest finish. But for baked dishes, sweet rice flour holds better under heat.
Looking for inspiration? Try this Gluten-Free Potato Salad that pairs perfectly with creamy sauces where a solid roux can shine underneath.
How to Make a Gluten-Free Roux Step-by-Step
Ingredients and Equipment Needed
Making a smooth, reliable gluten-free roux only takes a few pantry staples and basic kitchen tools. Here’s what you’ll need to get started:
Ingredients:
- 3 tablespoons unsalted butter
(You can use oil or ghee, but butter gives the most classic taste and texture.) - 2 tablespoons gluten-free flour
(Try white rice flour, sorghum flour, or your favorite gluten-free blend.) - Liquid (optional):
If you’re planning to turn your roux directly into a sauce, have your liquid—such as milk, broth, or plant-based milk—warmed and ready.
Equipment:
- Small saucepan or skillet
- Whisk (preferably metal for better control)
- Heatproof spatula
- Measuring spoons
Pro Tip: Stick with a nonstick or stainless steel pan—they distribute heat more evenly and prevent sticking or scorching.
Cooking Techniques for a Lump-Free, Creamy Roux
Once your ingredients are ready, follow this straightforward method to make a gluten-free roux that rivals any traditional version:
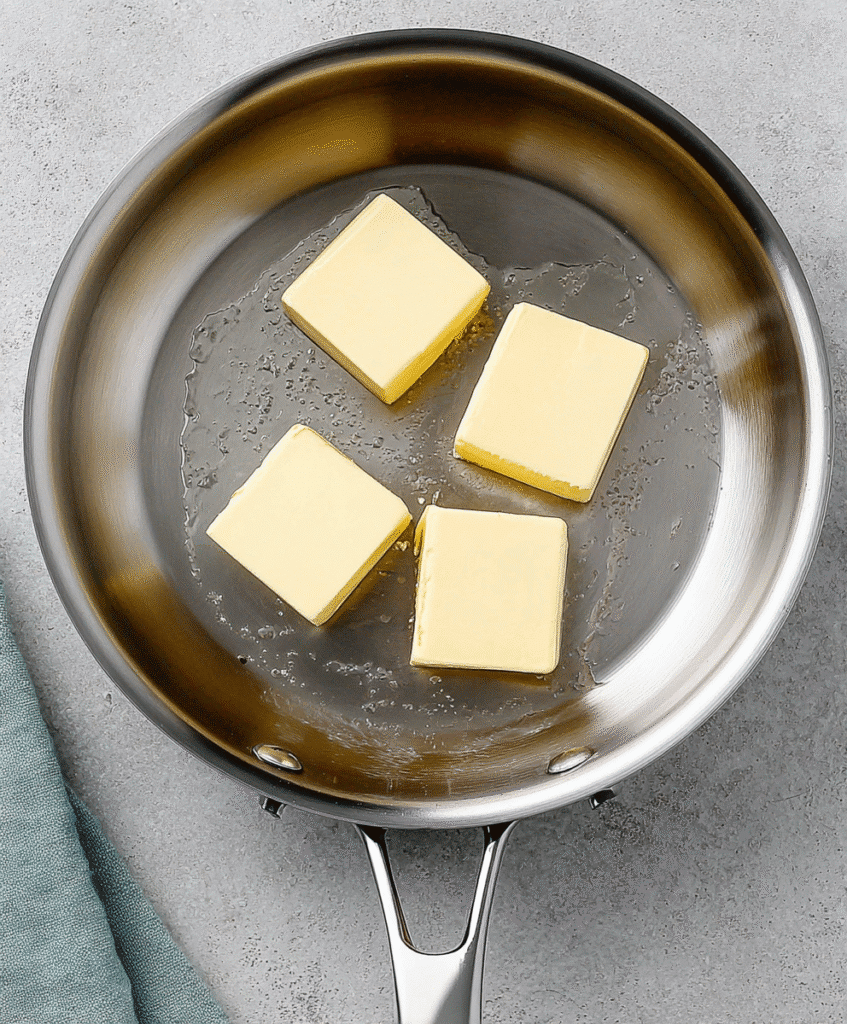
- Melt the Butter:
Set your saucepan over medium heat and melt the butter until it’s completely liquid and starting to bubble gently. Don’t let it brown (unless you want a nuttier flavor). - Whisk in the Flour:
Slowly sprinkle your gluten-free flour into the melted butter while whisking constantly. This prevents lumps and ensures even blending. - Cook for 2–3 Minutes:
Keep whisking! Let the mixture bubble and foam slightly, cooking off the raw flour taste. It should turn into a smooth, golden paste. If it smells nutty and slightly toasted, you’ve done it right. - Add Liquid (Optional):
If you’re using the roux as a direct sauce base (like for gravy or béchamel), slowly add your warm liquid a little at a time, continuing to whisk until fully combined. This step turns your roux into a full sauce.
Here’s a quick comparison chart to adjust your roux depending on the final dish:
| Roux Color | Cook Time | Best For |
|---|---|---|
| Blonde (pale) | 2 minutes | Cream sauces, cheese sauces |
| Medium | 3–4 minutes | Gravies, soups, chowders |
| Brown | 5+ minutes | Gumbo, stews, deep roasts |
Reminder: With a gluten-free roux, it’s easier to overcook because some flours brown faster than wheat. Stir constantly, and don’t walk away from the stove.
When I first tried using brown rice flour for gravy, I let it go just a minute too long—it went from smooth to scorched real quick. Now, I keep a timer handy and stay right at the pan until it’s done.
Don’t miss our The Best Gluten-Free Coconut Cream Pie if you want to explore dessert thickeners that play well with gluten-free methods.
Mistakes to Avoid When Making Gluten-Free Roux
Why Your Roux Might Turn Out Gritty or Thin
You followed the steps, but your gluten-free roux just isn’t right—it’s either too gritty, oddly thin, or separates after sitting for a while. Don’t worry, it happens to all of us. But once you know what to watch out for, you can fix these problems quickly.
Here are the most common culprits:
- Using the wrong flour:
Not all gluten-free flours are created equal. Some, like almond or coconut flour, just don’t have the starch content to thicken properly. For a creamy, smooth roux, stick with white rice flour, sweet rice flour, or sorghum. - Skipping the cook time:
If you don’t cook the flour long enough, your gluten-free roux will taste chalky or raw. That’s why the 2–3 minute whisking step is non-negotiable—it brings out a toasted flavor and removes bitterness. - Adding cold liquid too fast:
Dumping cold milk or broth into a hot roux shocks the flour and causes clumping. Warm your liquid first and add it slowly, whisking continuously. - Using too much flour:
With gluten-free flours, more doesn’t mean better. They absorb more liquid than wheat flour, so adding too much will make your sauce go from thick to gloopy real fast. - Letting it sit too long without stirring:
Gluten-free roux tends to settle and separate quicker than traditional roux. If you’re making a sauce in stages, give it a stir before each use to restore the texture.
Overcooking, Undercooking, and Other Common Errors
Another big mistake is overcooking your gluten-free roux—especially if you’re trying to go for that rich, brown color.
Some gluten-free flours (like tapioca or sweet rice flour) brown and burn faster than all-purpose flour. If you’re aiming for a darker roux, switch to sorghum or brown rice flour, which hold up better under longer heat.
Here’s a quick breakdown of what happens at each cooking stage:
| Roux Stage | What to Watch For | Fix |
|---|---|---|
| Undercooked | Chalky flavor, grainy texture | Whisk longer over medium heat |
| Overcooked | Bitter taste, dark specks, burnt smell | Lower heat, stir constantly |
| Over-thickened | Gummy or paste-like consistency | Add more warm liquid, whisk gently |
| Split or separated | Oil sitting on top of sauce | Re-whisk and reheat gently |
I learned the hard way when I tried making gluten-free gravy with a tapioca roux—I turned away for ten seconds, and it went from golden to burnt. These days, I stay close, lower the heat once it bubbles, and whisk like my life depends on it.
Don’t miss our Fabulous Italian Bread Gluten Free if you’re building a meal around sauces that need a rock-solid roux foundation.
Using Gluten-Free Roux in Everyday Recipes
How to Add Roux to Soups, Gravies, and Casseroles
Once you’ve mastered the art of making a gluten-free roux, the next step is using it in the right way. Whether you’re building a thick stew or a silky cheese sauce, the method for incorporating your roux can make or break the dish.
Here’s how to do it right:
- For soups:
After making your gluten-free roux in a separate pan, slowly ladle in warm broth or soup liquid while whisking. Once it’s smooth, add it back to your soup pot. This avoids clumping and lets you control the thickness. - For gravies:
Whisk your gluten-free roux directly into hot drippings or broth. Let it simmer until it thickens to your desired texture. A little goes a long way, so start small and build. - For casseroles:
Make your roux into a creamy sauce first (like a béchamel or cheese sauce), then mix it into your cooked ingredients. The roux locks in moisture and helps everything bake into one comforting, cohesive dish. - For mac and cheese:
A gluten-free roux makes all the difference. It gives the cheese sauce that velvety, clinging texture without turning gritty or oily. Use sweet rice flour here for best results—it thickens fast and holds beautifully.
Tip: If you’re making a big batch of gluten-free cheese sauce, you can double the roux and store extra for next-day leftovers—it’ll reheat smoother if you whisk in a splash of warm milk or broth.
Don’t forget to check out Gluten-Free Fish and Chips where a well-made gluten-free roux-style batter can be the secret to that perfect crispy coating.
Best Pairings and Liquid Bases for a Smooth Finish
Your roux is only as good as the liquid you pair it with. Different liquids can completely change the flavor, texture, and purpose of your sauce.
Here’s a quick pairing guide:
| Liquid | Flavor Notes | Best Use |
|---|---|---|
| Whole Milk | Creamy, classic | Mac and cheese, béchamel |
| Almond Milk | Nutty, light | Vegan sauces, light soups |
| Chicken Broth | Savory, hearty | Gravy, stews, casserole bases |
| Vegetable Broth | Earthy, mild | Vegetarian soups, lentil stews |
| Coconut Milk | Rich, tropical | Thai-inspired sauces, dairy-free gravy |
One last reminder: Always warm your liquid before adding it to the roux. Cold liquid makes the mixture seize and clump. Warm liquid melts into it, creating a glossy, creamy base you’ll want to eat with a spoon.
Make-Ahead Tips and Storage Guidelines
How Long Can You Store Gluten-Free Roux?
You’ve just made a silky, golden gluten-free roux, and you’re thinking—can I stash this for tomorrow’s gravy or next week’s lasagna? The short answer: yes, but with some caveats.
Here’s how to store it right:
- In the fridge:
Store your cooled gluten-free roux in an airtight glass jar or container for up to 3 days. Label it with the date and type of flour used, especially if you’re testing new blends. Different flours react differently over time. - To use again:
When reheating, warm the roux gently on the stove over low heat. Add a splash of broth or milk and whisk continuously to bring back its creamy texture.
Be aware: a gluten-free roux tends to thicken more as it cools, especially if you used sweet rice flour. So, don’t worry if it looks a bit dense out of the fridge—it’ll loosen up once you reheat it.
Want more comfort food to go with that make-ahead roux? Don’t miss our Ultimate Gluten-Free Banana Pudding Guide for a nostalgic finish to any meal.
Can You Freeze Gluten-Free Roux? What to Know
Here’s where things get tricky. While traditional wheat roux can sometimes freeze and reheat decently, gluten-free roux doesn’t love the freezer.
Why? Because the starches in gluten-free flour change texture when frozen and thawed. This can lead to separation, clumping, or a broken sauce when you try to use it later.
Still want to try? If you do freeze it, follow these steps:
- Cool the roux completely
- Divide it into small portions (ice cube trays work great)
- Wrap tightly in plastic or airtight bags
- Use within 1 month for best results
That said, you’re better off making it fresh. It only takes 5 minutes—and the flavor and texture are so much better. That’s the beauty of a good gluten-free roux: quick, clean, and completely customizable.
Here’s a quick storage recap:
| Storage Method | Duration | Tips |
|---|---|---|
| Refrigerator | Up to 3 days | Use glass jars, reheat slowly |
| Freezer | Not recommended | May separate, use small portions |
| Room Temp | Avoid | Must be refrigerated for food safety |
Gluten-Free Roux vs Other Gluten-Free Thickeners
Arrowroot, Cornstarch, Potato Starch – Pros & Uses
When you’re cooking without gluten, there’s no shortage of thickening options. But how does a gluten-free roux compare to quick fixes like arrowroot, cornstarch, or potato starch?
Let’s break it down:
| Thickener | How It Works | Best For | Pros | Cons |
|---|---|---|---|---|
| Gluten-Free Roux | Flour + fat cooked together | Gravies, cheese sauces, stews | Deep flavor, rich texture, stable when reheated | Takes longer, more hands-on |
| Cornstarch | Mixed with cold water, added to hot liquid | Stir-fries, clear sauces | Fast thickening, neutral flavor | Can turn gluey, breaks down if overheated |
| Arrowroot | Whisked into warm liquid | Glossy sauces, fruit glazes | Glossy finish, works well in acidic recipes | Doesn’t hold up to long cooking |
| Potato Starch | Stirred in at end | Soups, creamy sauces | Very smooth, no strong taste | Can become grainy if boiled too long |
| Tapioca Starch | Quick-cooking thickener | Asian sauces, glossy reductions | Stretchy texture, fast acting | Can get stringy or too elastic |
While these thickeners are great in a pinch, a gluten-free roux offers better depth of flavor, especially in slow-cooked dishes. It also holds its structure well when reheated—making it perfect for leftovers or make-ahead meals.
If you’re aiming for a velvety mac and cheese, a gluten-free roux will deliver a sauce that clings to every noodle. Arrowroot or cornstarch might thicken, but they won’t give you the same richness.
Why Roux Offers Better Flavor and Texture
The reason a gluten-free roux shines in cooking comes down to three things: control, flavor, and finish.
- Control:
With a roux, you can build texture gradually. You start by cooking the flour and fat together, and then slowly whisk in your liquid. This gives you complete control over thickness. - Flavor:
Cooking the flour unlocks a toasty, buttery flavor that starches just can’t match. Roux adds dimension, not just thickness. - Finish:
Sauces made from a gluten-free roux tend to reheat and hold up better—especially in baked dishes. Other thickeners sometimes separate or go watery.
Still not sure which route to take? Ask yourself:
- Do I want fast thickening with minimal cooking? Go with cornstarch.
- Do I want a hearty, savory, classic-style sauce? Go with a gluten-free roux.
Check out our Gluten Free Ice Cream Cake if you want a full meal ending in a creamy, thickened dessert that shows the power of knowing your ingredients.
Expert Tips and Chef Tricks for Perfect Gluten-Free Roux
Whisking Methods and Timing Tricks from the Pros
One thing every pro chef agrees on? A great gluten-free roux is all about technique. You don’t need fancy tools or rare ingredients—just a few solid habits and timing tweaks.
Here’s what professionals (and seasoned home cooks) swear by:
- Use a flat whisk
A flat balloon whisk gives you better control and helps you reach the corners of your pan. That means fewer clumps and even cooking. - Melt butter slowly, not fast
Rushing the fat will cause uneven heat, which can burn your flour. Set your burner to medium, let the butter melt gently, and build flavor from there. - Toast the flour just right
Don’t undercook it. Let your gluten-free flour bubble and toast for 2–3 minutes. That raw taste will cook off, and you’ll unlock rich, nutty flavor. - Don’t stop stirring
Step away for even 10 seconds, and your roux can burn—especially with gluten-free flours like sweet rice or tapioca. Constant whisking = smooth texture. - Add liquid gradually
Pour warm liquid (milk or broth) in small amounts, whisking well between additions. This keeps your gluten-free roux from seizing or lumping.
Chef’s tip: If you’re making a darker roux (like for gumbo or deep gravies), switch to sorghum flour—it browns better and holds its structure longer.
When I first tested these techniques at home, I realized that just a 10-second delay made all the difference. My second try? Smooth as silk, and the sauce held up perfectly even after reheating.
Looking for inspiration? Try adding your roux to hearty classics like our Gluten-Free Cherry Pie, which pairs beautifully with thickened berry glazes made from scratch.
Butter vs Oil: What’s Best for Flavor and Texture?
One of the biggest debates in roux-making—especially in gluten-free cooking—is whether to use butter or oil as your fat base. Here’s the breakdown:
| Fat Type | Flavor | Performance | Best Use |
|---|---|---|---|
| Butter | Rich, classic, savory | Melts evenly, adds nutty depth | Gravy, cheese sauce, béchamel |
| Olive Oil | Light, earthy | Higher smoke point, blends smoothly | Mediterranean-style dishes, soups |
| Ghee | Toasted, nutty | Great for high-heat cooking | Indian or dairy-free variations |
| Coconut Oil | Subtle coconut note | Vegan option, solid at room temp | Curry-style sauces, tropical dishes |
So which is better? For most dishes, butter wins. It delivers the richest, most nostalgic flavor and makes your gluten-free roux taste like the one Grandma used to make.
But if you’re dairy-free or looking for unique flavor profiles, olive oil or ghee are strong substitutes—just adjust cook time and watch closely to avoid burning.
Creative Gluten-Free Roux Variations
Dairy-Free, Vegan, and Herb-Infused Options
If you thought gluten-free roux had to be basic or boring, think again. With a few smart swaps and creative add-ins, you can turn a simple roux into a signature flavor base for any diet or cuisine.
Dairy-Free & Vegan Roux
Yes, you can totally make a gluten-free roux without butter. In fact, it’s pretty easy:
- Use plant-based oils like avocado oil, olive oil, or even refined coconut oil.
- Pair with gluten-free flours such as sweet rice flour or sorghum for a creamy, smooth result.
- Cook it the same way—just make sure to stir constantly, as oil-based roux can separate faster than butter-based versions.
For a richer taste, try using ghee (clarified butter), which is lactose-free but still has that toasty flavor. If you’re fully vegan, olive oil is your safest, most neutral-flavored choice.
Herb-Infused Roux
Add herbs, spices, or aromatics during the cooking process to flavor your roux before the sauce even begins:
- Stir in minced garlic or shallots just before adding the flour.
- Mix in fresh thyme, rosemary, or a dash of smoked paprika as the roux begins to bubble.
- Add black pepper, nutmeg, or onion powder for deeper, savory notes—especially in cheese sauces or mushroom gravies.
These little additions make your gluten-free roux taste intentional, not just functional.
Spiced and Flavor-Boosted Roux Blends
Want to really take your roux to the next level? Try blending flours for new textures and layering in global spices. Here are a few flavorful twists to try:
| Variation | Flour Combo | Best Spices to Add | Perfect For |
|---|---|---|---|
| Cajun-Style Roux | Sorghum + Brown Rice | Cayenne, smoked paprika, oregano | Gumbo, jambalaya, dirty rice |
| Asian-Inspired Roux | Sweet Rice + Tapioca | Ginger, white pepper, garlic | Coconut curries, stir-fry sauces |
| Italian Herb Roux | White Rice + GF Blend | Basil, rosemary, onion powder | Alfredo, baked pasta, lasagna |
| Vegan Butter Roux | GF Blend + Avocado Oil | Turmeric, cumin, coriander | Lentil stews, vegan gravy |
One of my personal favorites? A garlic-thyme infused roux made with olive oil and brown rice flour—it made my gluten-free white lasagna sauce taste better than the original.
Don’t miss our Blueberry Almond Clafoutis Gluten Free to wrap up your dinner with a beautifully thickened custard-like dessert that uses a gentle flour base.
Conclusion
Making a gluten-free roux might sound like a culinary challenge—but once you get the hang of it, it’s one of the most powerful tools in your gluten-free kitchen. From velvety gravies to creamy casseroles and comforting sauces, this humble flour-and-fat combo does a lot of heavy lifting.
All you need is a solid base flour, the right fat, and a little technique—and you’ll be building deep flavor and silky textures without a trace of gluten. Whether you’re cooking for family, prepping holiday dishes, or simply recreating Grandma’s Sunday sauce, this gluten-free roux guide is your go-to resource.
Follow us on Facebook & Pinterest for more gluten-free dessert ideas and community fun!
FAQ Section
What is a gluten-free alternative to roux?
If you want to avoid making a traditional roux, several gluten-free alternatives work well. Cornstarch, arrowroot powder, potato starch, and tapioca starch all thicken sauces without using flour. However, they don’t offer the same flavor depth or creamy texture. A properly made gluten-free roux remains the closest match to the classic technique—especially in gravies and cream sauces.
When making a roux, can you use gluten-free flour?
Absolutely. Gluten-free flours like rice flour, sorghum flour, sweet rice flour, or even gluten-free all-purpose blends can all be used to make roux. Just remember to adjust the ratio: instead of equal parts, use 2 parts flour to 3 parts fat for best results.
What is the best gluten-free flour for sauces?
White rice flour is one of the best options for making smooth, neutral-tasting sauces. For thicker or stickier sauces, sweet rice flour works beautifully. If you’re making a deep, nutty sauce like gumbo, sorghum flour holds up best under long cooking.
What is a gluten-free way to thicken sauce?
Aside from making a gluten-free roux, you can thicken sauces using cornstarch slurry, arrowroot, potato starch, or pureed vegetables like cauliflower or beans. Each method has pros and cons, but gluten-free roux offers the most flavor and structure for reheating or baking.

1 thought on “How to Make a Perfect Gluten-Free Roux (With Tips, Flours, and Mistakes to Avoid)”