Gluten free sourdough bread was never something I grew up eating—but the sourdough part? That was baked into my childhood. I remember watching my grandmother’s hands move like poetry over soft dough in a warm kitchen, with the scent of rising bread hugging every corner of the room. Back then, everything was made with wheat flour, and gluten was just “flour” to us. But fast-forward to today, when I can’t tolerate gluten, and I had to ask: Can gluten free sourdough bread ever taste like the real thing?
The answer? Absolutely—if you do it right.
In this comprehensive guide, you’ll learn how to make gluten free sourdough bread that’s crusty, chewy, and packed with that signature tang. Whether you’re avoiding gluten for health reasons or experimenting with more gut-friendly baking, I’ll walk you through the flours, starter, binders, hydration, shaping, and baking techniques that actually work. Plus, I’ll share personal tips from my own journey (including the flops) so you can skip the learning curve and jump straight to success.
Gluten free sourdough bread is more than just swapping out wheat. It’s about understanding how different gluten-free flours behave, how to keep a sourdough starter alive without traditional grains, and how to create structure with natural binders like psyllium husk. Once you get the hang of it, it’s surprisingly intuitive—and incredibly rewarding.
Don’t miss our gluten-free biscuits and gravy for another comfort food classic, or check out these chocolate cupcakes to round out your homemade gluten-free menu.
Let’s dive into the essentials of gluten free sourdough bread—and get your kitchen smelling like a bakery again.
Table of Contents
Table of Contents
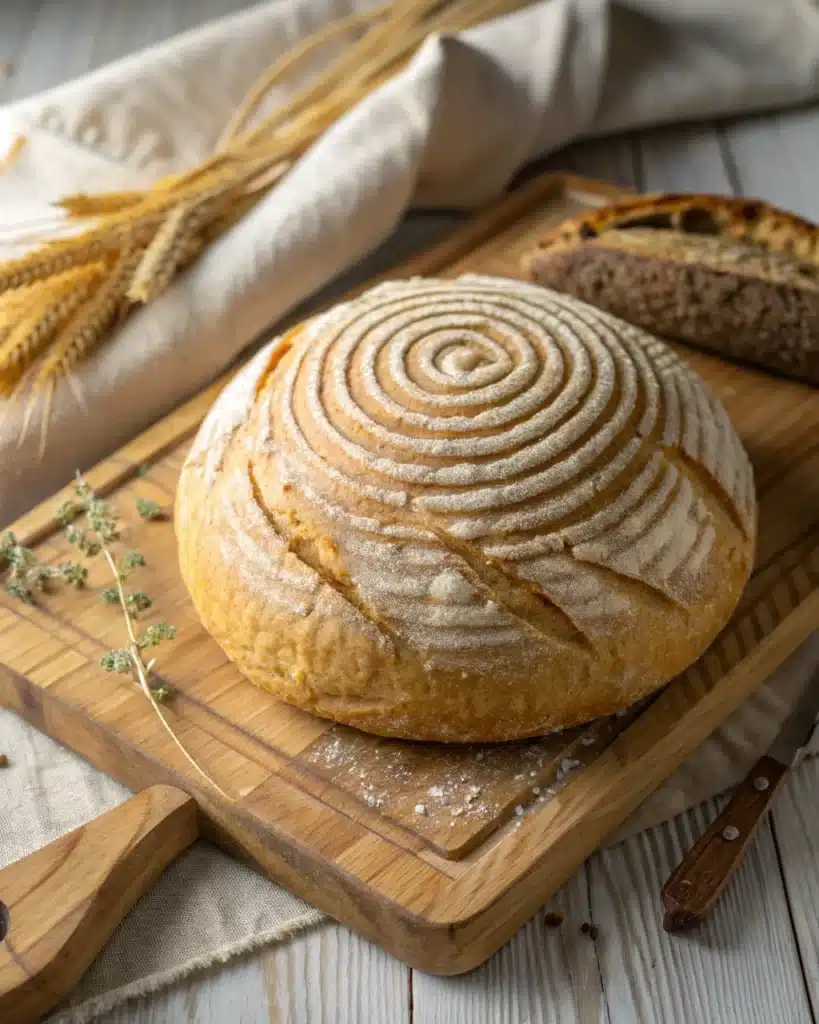
Understanding Gluten-Free Sourdough Bread
What Makes Sourdough Bread Gluten-Free?
Traditional sourdough relies on wild yeast and beneficial bacteria to ferment wheat-based dough. That’s great—unless you’re gluten intolerant. Gluten free sourdough bread replaces conventional flours like wheat, rye, or spelt with non-gluten alternatives such as brown rice flour, sorghum, millet, or quinoa.
But here’s the twist: fermentation still plays the same key role. It helps break down starches, produces natural leavening, and develops the sour flavor that defines sourdough. Even without gluten, you can achieve a beautifully structured loaf with the right technique and ingredients.
The absence of gluten doesn’t mean compromising on texture. Binders like psyllium husk act as structural scaffolds, mimicking the elastic network gluten provides. When done right, gluten-free sourdough can be just as airy, chewy, and satisfying as traditional bread.
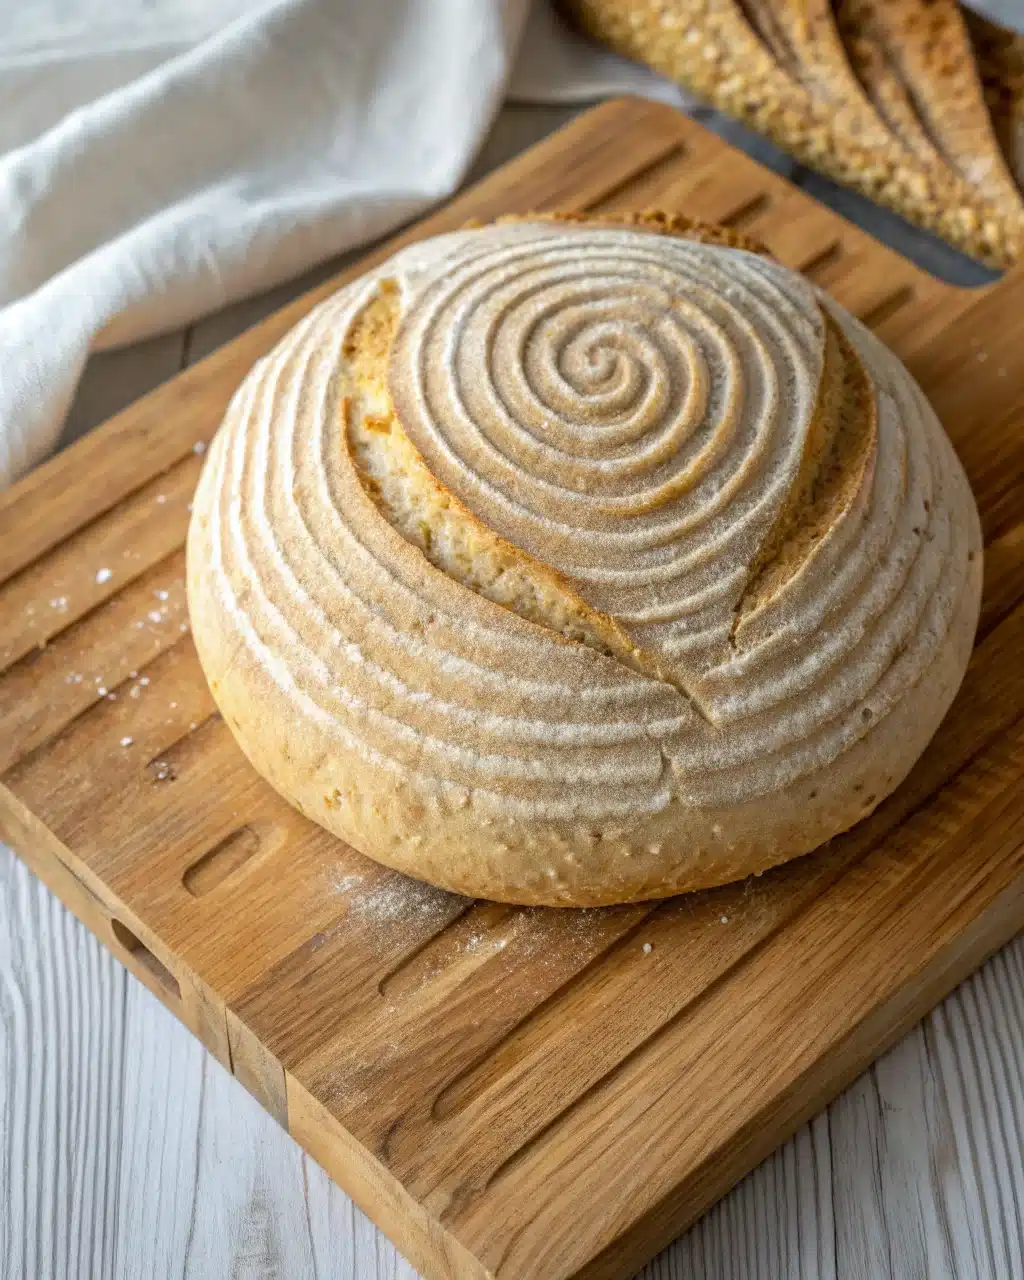
Gluten Free Sourdough Bread: The Ultimate Guide for Delicious Homemade Loaves
Ingredients
Method
- In a small bowl, mix psyllium husk and warm water. Let sit 5–10 mins until gel forms.
- In a large bowl, combine all flours, starch, and salt.
- Add starter, psyllium gel, and sweetener (if using). Mix until a sticky dough forms.
- Cover and rest for 10 minutes. Then shape into a round or loaf and place in a proofing basket or pan.
- Proof at room temp for 3–4 hours or overnight in the fridge.
- Preheat oven to 450°F (230°C) with Dutch oven inside for at least 45 minutes.
- Flip dough onto parchment, score with lame or sharp knife, and bake covered 45 mins.
- Remove lid and bake an additional 25–30 mins until crust is golden and hollow-sounding.
- Cool completely before slicing. Serve fresh or freeze in slices.
Nutrition
Notes
- For best results, use a digital kitchen scale and fresh, whole psyllium husk.
- You can substitute flours but maintain the balance between whole grains and starches.
- For stronger sour flavor, use less starter and extend fermentation time.
- Let bread cool fully to avoid a gummy interior.
Tried this recipe?
Let us know how it was!The Science Behind Fermentation and Digestion
One of the greatest benefits of sourdough bread lies in its fermentation. Natural yeasts (like Saccharomyces cerevisiae) and lactobacilli break down complex carbohydrates and phytic acid, which makes the nutrients more bioavailable and the bread easier to digest.
While traditional sourdough fermentation can reduce gluten, it’s not completely safe for celiac sufferers unless fully gluten-free flours are used. That’s why a dedicated gluten-free starter and carefully sourced flours are essential.
This slow fermentation process also enhances the bread’s flavor profile. Compared to store-bought gluten-free loaves—which are often bland and dry—homemade sourdough has tangy depth, better structure, and a longer shelf life.
Don’t miss our gluten-free biscuits and gravy recipe for another comfort-food favorite made without wheat.
Choosing the Best Ingredients for Gluten-Free Sourdough
Best Gluten-Free Flours for Sourdough Bread
Making gluten free sourdough bread is both an art and a science—and it all starts with the flour. Unlike traditional loaves that rely on wheat, gluten-free bread needs a careful blend of flours to create structure, softness, and depth of flavor. Each flour brings something unique, and the right combo is what makes a homemade loaf shine.
Here’s a quick breakdown of the most popular gluten-free flours used in sourdough recipes:
| Flour Type | Texture | Why It Matters |
|---|---|---|
| Brown Rice Flour | Mild and slightly gritty | A staple base; pairs well with other grains |
| Sorghum Flour | Smooth and neutral | Adds softness and subtle sweetness |
| Millet Flour | Light and powdery | Softens crumb, enhances color |
| Quinoa Flour | Earthy and nutty | Boosts sourness and nutrition |
| Buckwheat Flour | Dense and rustic | Adds color, fiber, and a deep, bold flavor |
| Tapioca or Arrowroot | Silky and stretchy | Essential for rise, chewiness, and lift |
| Potato Starch | Ultra-fine | Improves airiness, softens the crust |
If you’re serious about baking gluten free sourdough bread, skip the premixed flours and go custom. A strong base (like brown rice or sorghum) matched with starches (such as tapioca or potato) helps your dough hold together while baking into a fluffy, flavorful loaf.
Start with a ratio like this:
- 40% whole grain (brown rice, millet, or sorghum)
- 30% starch (tapioca or potato)
- 30% support grain (quinoa or buckwheat)
Don’t be afraid to test blends. Each one will bake a little differently depending on your hydration and starter activity. Want a softer finish? Try incorporating millet. Looking for that bold sour punch? Add a little quinoa to the mix.
Discover great ideas like this gluten-free pancake recipe to experiment with sorghum and starch-based blends outside of bread too.
Why Psyllium Husk Is Crucial in Gluten-Free Dough
One of the biggest challenges in gluten free sourdough bread is structure. Without gluten, your dough lacks elasticity and strength. Enter psyllium husk—an all-natural binder that changes everything.
When hydrated, psyllium forms a gel that acts like gluten, holding your dough together during fermentation and baking. It traps gas from your starter, maintains moisture, and supports the chewy texture that makes sourdough so satisfying.
Here’s what psyllium husk brings to your bread:
- Mimics gluten elasticity, making the dough easier to shape
- Reduces gumminess in the final loaf
- Improves oven spring, helping your bread rise taller
- Adds fiber and boosts nutritional content
For best results, use the whole husk—not the powder. Stir it into warm water with your sweetener (like maple syrup or honey), and let it thicken before adding it to the rest of your ingredients.
Without psyllium, most gluten free sourdough bread will fall apart, struggle to rise, or bake up dense and gummy. It’s a small step that makes a massive difference.
Looking for more gluten-free baking wins? Don’t miss our gluten-free German chocolate cake, where texture and structure are just as crucial.
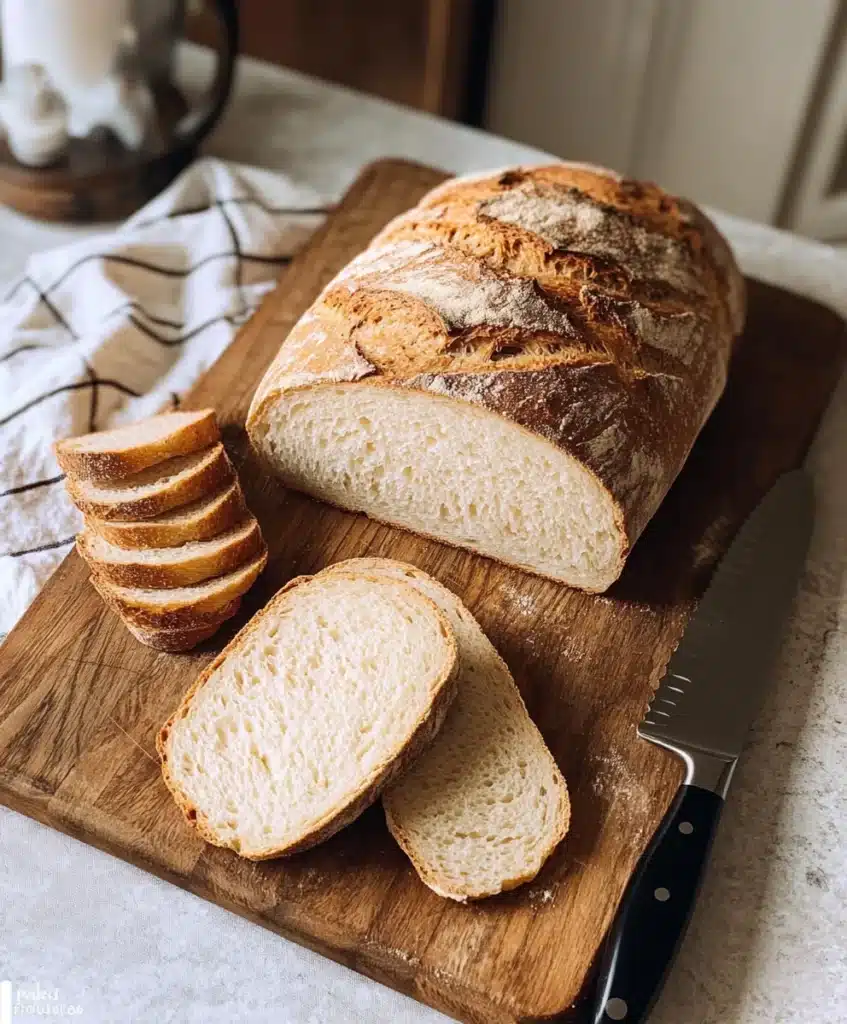
How to Make a Gluten-Free Sourdough Starter
Step-by-Step Process to Cultivate Your Gluten-Free Starter
Every great gluten free sourdough bread begins with a healthy, active starter. This mixture of gluten-free flour and water ferments over time, cultivating wild yeast and beneficial bacteria that help your bread rise naturally without the need for commercial yeast.
Building your own gluten-free starter from scratch isn’t as hard as it seems. All it takes is a clean jar, some patience, and the right flour to get those microbes moving.
What You’ll Need:
- Glass jar (16 oz or larger)
- Brown rice flour, sorghum, or millet (avoid starch-heavy blends)
- Filtered or dechlorinated water
- Digital kitchen scale
- Rubber band or masking tape (to track rise)
Daily Feeding Schedule (7-Day Plan)
| Day | Action Steps |
|---|---|
| Day 1 | Mix 50g brown rice flour + 50g filtered water. Stir until smooth. Cover loosely. |
| Day 2 | Stir. No need to feed yet unless bubbles appear. |
| Day 3 | Discard half. Feed 50g flour + 50g water. Stir, cover, and mark starter level. |
| Day 4 | Repeat feeding. Look for signs of bubbling and a mild sour smell. |
| Day 5 | Continue the same process. You should see doubling in size within 6 hours. |
| Day 6 | Optional: begin feeding with a mix of brown rice and sorghum for a richer flavor. |
| Day 7 | Starter should be bubbly, active, and ready for baking gluten free sourdough bread. |
Once your starter consistently doubles in size after feeding, it’s ready to leaven your dough. Remember, gluten-free starters tend to be less vigorous than traditional ones—so give it a bit more time if needed.
Want to test your starter before baking your first loaf of gluten free sourdough bread? Try using a scoop in a simple discard recipe like these easy gluten-free biscuits.
Common Mistakes and Fixes When Starting Out
If you’ve tried building a gluten-free starter before and it flopped, don’t worry. Most issues are easy to correct. Below are the most common problems new bakers face when prepping their base for gluten free sourdough bread.
❌ Problem: No activity or bubbles after several days
✅ Fix: Boost your flour’s nutrition. Sorghum or teff flour can energize the microbes. Keep the jar in a warm place (70–75°F).
❌ Problem: It smells bad (rotten vs. sour)
✅ Fix: You may have introduced bad bacteria. Discard most of the mix, feed it fresh, and sanitize your container.
❌ Problem: The starter is too thick or watery
✅ Fix: Aim for the consistency of pancake batter. Adjust water or flour by 5–10 grams to fix texture.
❌ Problem: No rise, even with bubbles
✅ Fix: Switch up your flour type. Some store-bought blends contain gums and starches that hinder fermentation. Stick with whole grain flours.
Consistency is key. Feeding your starter at the same time each day keeps your microbes happy. It may take a few extra days, but soon you’ll have the perfect leavening base for all your gluten free sourdough bread creations.
For more gluten-free structure tips, check out our gluten-free vanilla cupcakes where the right ingredients also create a flawless rise and soft crumb.
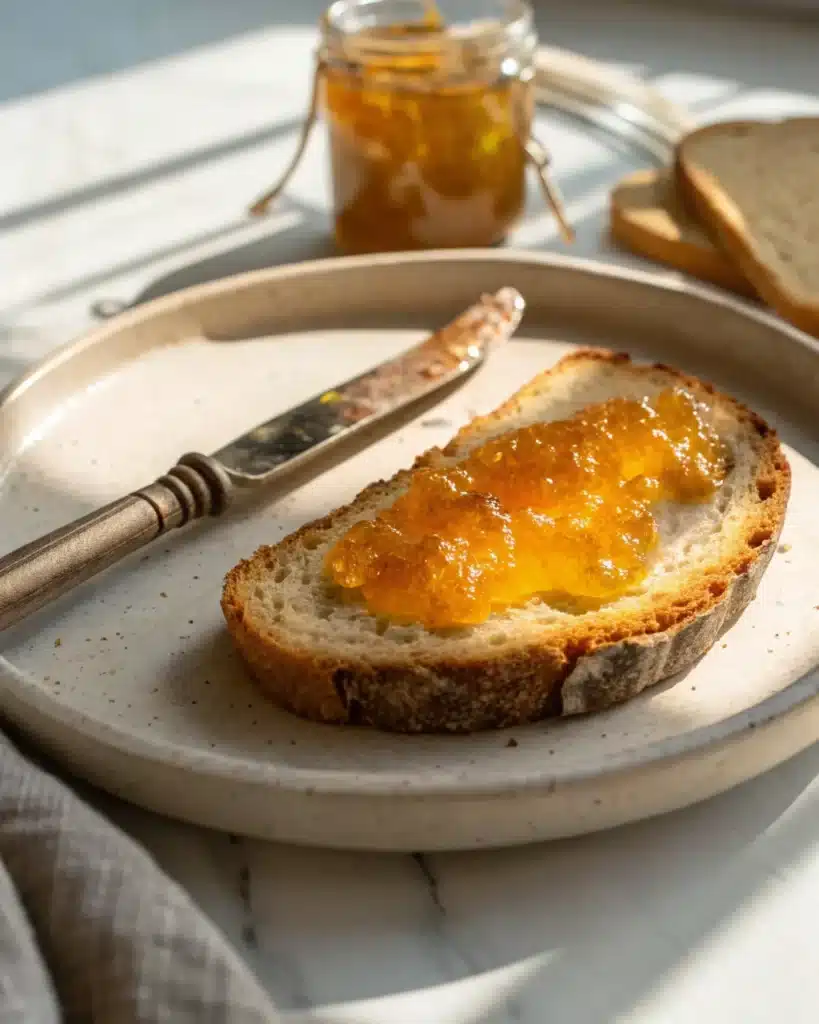
Perfecting Your Gluten-Free Sourdough Dough
Hydration Ratios, Texture Tips, and What to Avoid
Creating the perfect dough is the make-or-break moment in baking gluten free sourdough bread. This isn’t your typical wheat-based dough. It’s wetter, more delicate, and needs a different approach to hydration and handling.
Hydration refers to the ratio of water to flour. For gluten-free recipes, higher hydration is essential. Because gluten-free flours absorb more liquid, your dough will likely need 85% to 100% hydration to achieve the right softness and rise.
For example, if you’re using 500g of total flour, you’ll want somewhere between 425g and 500g of water. Adjust this based on your flour blend:
- Whole grain flours like sorghum, teff, or brown rice absorb more water.
- Starches like tapioca and potato starch add fluffiness but need less hydration.
Too wet? Your dough may collapse or bake up gummy.
Too dry? It may crack, feel stiff, and won’t rise well.
The right consistency for gluten free sourdough bread dough should be sticky but manageable—similar to thick cake batter or soft clay. Use a wet hand or dough scraper to handle it more easily.
Want to explore how flour combinations affect consistency? Try this gluten-free popover mix for a quick rise alternative that uses a similar hydration method.
Kneading and Proofing: Techniques for Consistent Results
Here’s the good news: gluten free sourdough bread doesn’t require heavy kneading. Since there’s no gluten to develop, your main goal is to hydrate the flour completely and distribute your starter and psyllium gel evenly.
Follow these easy steps to mix and prep your dough:
- Make your psyllium gel: Mix whole psyllium husk with warm water and let it sit until thick.
- Combine dry ingredients: Blend your chosen gluten-free flours, starches, and salt.
- Add wet ingredients: Stir in the psyllium gel, active starter, and olive oil (optional).
- Mix thoroughly: Use a spoon or stand mixer until you get a unified dough. Let it rest 10 minutes.
After resting, shape your dough into a round boule or loaf shape. You can use a banneton basket or a loaf pan, depending on the look you want.
When it comes to proofing, gluten free sourdough bread requires just one rise, but it must be done right. Here’s how:
- Room temperature proof: 3 to 4 hours
- Overnight cold proof: 8 to 12 hours in the fridge
- Dough should look puffed, slightly cracked on top, and feel airy when touched
Keep an eye on your environment. Proofing times vary based on temperature, humidity, and your starter’s activity. To track your dough’s rise, mark the container with a rubber band or piece of tape after shaping.
Avoid these common issues:
- Over-proofed dough: Bakes flat with large internal gaps
- Under-proofed dough: Comes out dense and undercooked in the center
Mastering the dough stage of gluten free sourdough bread takes a bit of trial and error, but once you get it right, your loaf will rise beautifully with an open crumb and crisp crust.
If you’re looking to test your shaping skills before diving into full loaves, check out our gluten-free vanilla cupcakes where balance and batter handling matter just as much.
Baking Techniques That Make All the Difference
The Right Bakeware: Dutch Oven vs. Loaf Pan
You’ve mixed and proofed your dough—now it’s time to bake your gluten free sourdough bread. And here’s the secret: how you bake is just as important as what’s in your dough. The choice between a Dutch oven and a loaf pan directly impacts your bread’s texture, rise, and crust.
A Dutch oven is ideal for recreating bakery-style loaves at home. Its heavy lid traps steam during the first stage of baking, which is critical for a strong oven spring and a chewy crust. The thick walls also help maintain consistent heat throughout the bake.
- Best for: round, crusty boules
- Tip: Preheat at 450°F for at least 45 minutes before loading the dough
If you prefer a more traditional, sandwich-style loaf, a metal loaf pan works beautifully. It’s easier to handle and great for shaping and slicing.
- Best for: sandwich loaves and soft interiors
- Tip: Proof the dough right in the pan so you don’t need to transfer it later
Whether you go rustic or classic, your bakeware should complement the hydration level and shape of your gluten free sourdough bread dough.
Looking for recipe testing tips? Check out our gluten-free vanilla cupcakes where structure and texture are just as vital.
How to Score and Bake for Better Rise
Scoring is more than just pretty lines—it’s a crucial step in baking gluten free sourdough bread. Proper scoring directs the rise and prevents random cracking during the bake.
Here’s how to do it right:
- Gently flip your proofed dough onto parchment paper.
- Use a lame or sharp knife to create a shallow slash (about ¼ inch deep).
- Lower the dough into a preheated Dutch oven or place your loaf pan directly into the oven.
- Bake covered (if using Dutch oven) for 40–45 minutes, then uncover for another 25–30 minutes for a golden finish.
For loaf pan baking, you may skip scoring, but brushing the top with water or oil can improve crust color.
Signs your gluten free sourdough bread is fully baked:
- Firm, golden crust
- Hollow sound when tapped on the bottom
- Loaf springs back gently when pressed
Don’t slice too soon! Cutting hot bread lets steam escape and can lead to a gummy crumb. Let your loaf rest for at least an hour before slicing.
Troubleshooting Common Baking Issues
Even when your dough looks perfect, your gluten free sourdough bread can still surprise you in the oven. Here are quick fixes to help troubleshoot typical problems.
| Issue | Cause | Solution |
|---|---|---|
| Gummy center | Undercooked or overhydrated dough | Bake longer and reduce water slightly |
| Pale, soft crust | Oven too cool or not preheated | Preheat thoroughly, finish bake uncovered |
| Flat or collapsed loaf | Over-proofed or scored too late | Reduce proof time and score just before baking |
The key to baking outstanding gluten free sourdough bread is consistency. Every oven is different, and every flour blend reacts in its own way. Take notes as you go—this helps you improve every batch.
Looking to test flour behavior in another bake? Don’t miss our gluten-free pancake recipe for a quick, fun way to explore hydration and texture balance.
Flavor Enhancements & Creative Variations
Additions Like Seeds, Herbs, and Sweeteners
Once you’ve mastered the basics of gluten free sourdough bread, it’s time to get creative. One of the best parts about baking your own bread is customizing it to suit your flavor preferences. Gluten-free dough is incredibly versatile and responds well to a range of additions—both sweet and savory.
Here are some ideas to enhance your next loaf:
| Ingredient | Purpose | When to Add |
|---|---|---|
| Chia, flax, sesame | Boost texture, nutrition, crunch | Mix into dough before proofing |
| Rosemary, thyme | Add herby, aromatic depth | Stir into flour blend |
| Garlic powder | Enhances savory flavor | Mix with dry ingredients |
| Honey or maple | Adds moisture and mild sweetness | Blend into psyllium gel |
| Cinnamon, raisins | Turns it into a sweet breakfast loaf | Fold in after mixing dough |
Adding ingredients can slightly affect hydration. For example, seeds may absorb moisture, while sweeteners like honey add stickiness. Make minor adjustments to your water or flour ratio if needed, keeping your gluten free sourdough bread texture consistent.
Want something sweet and indulgent? Don’t miss our gluten-free chocolate cupcakes for dessert ideas that complement a savory bread spread.
Flavor Profiles Based on Flour Combinations
Beyond mix-ins, the flour blend itself shapes the flavor of your gluten free sourdough bread. Each gluten-free flour contributes different notes—from earthy to tangy to nutty.
Here’s a quick guide to customizing taste through flours:
- Sorghum + millet: Mild and slightly sweet, perfect for everyday loaves
- Teff + quinoa: Nutty, deep, and ideal for darker, richer bread
- Buckwheat + brown rice: Earthy and rustic with a hearty finish
- Add oat flour (if tolerated): Softens crumb and adds mellow sweetness
You can also enhance sourness by tweaking your fermentation schedule. A longer proofing time—especially with a lower starter percentage—can bring out tangier notes that make your loaf taste like a classic bakery sourdough.
Experiment with cold-proofing overnight in the fridge. This not only deepens flavor but also makes handling the dough easier. The chilled dough becomes firmer and easier to score.
Want stronger sour flavor in your gluten free sourdough bread? Try a preferment that sits at room temperature for 12–18 hours. This allows lactobacillus bacteria more time to develop acidity naturally.
Need a contrast to these bold flavors? Try our gluten-free vanilla cupcakes for a light and simple sweet bake.
Pro Tip: Rotate Recipes Seasonally
Adapt your base recipe by using seasonal herbs, spices, and dried fruits. In winter, add cinnamon and cranberries. In summer, experiment with fresh basil and sun-dried tomatoes. These small changes can make your gluten free sourdough bread feel brand new with every batch.
When making savory versions, consider topping your shaped loaf with flaky salt or mixed seeds just before baking. This not only boosts flavor but also gives your crust a beautiful finish.
Troubleshooting Gluten-Free Sourdough Issues
Even experienced bakers occasionally run into trouble when baking gluten free sourdough bread. From gummy centers to collapsed loaves, small issues in your process can create big frustrations. The good news? Most problems have simple fixes.
This section covers the most common challenges and how to troubleshoot them like a pro.
Why Is My Bread Gummy or Dense?
This is the most common complaint in gluten-free baking—and the most preventable.
Causes of gummy gluten free sourdough bread:
- The loaf wasn’t baked long enough
- Your hydration ratio was too high
- You sliced too soon before it fully cooled
- Your starter wasn’t active enough
Fixes:
- Bake for 10–15 minutes longer with foil on top if crust darkens too fast
- Reduce water by 10–20g or increase flour by 10–15g
- Let the bread cool for at least 90 minutes before slicing
- Make sure your starter doubles within 6 hours after feeding
Need a backup plan? Use extra slices from a gummy loaf to make easy gluten-free biscuits or homemade breadcrumbs.
Why Didn’t My Bread Rise?
If your gluten free sourdough bread comes out flat, it likely had trouble rising during proofing or lacked oven spring.
Possible reasons:
- Starter wasn’t strong enough
- You over-proofed the dough
- Your oven or Dutch oven wasn’t hot enough
- The dough was too dry to trap air
Solutions:
- Feed your starter twice the day before baking to boost strength
- Shorten proof time by 30–60 minutes if the dough looks over-puffed
- Always preheat your Dutch oven for at least 45 minutes
- Adjust hydration slightly; wetter dough rises better but needs balance
If your bread rose but cracked oddly, the issue may be scoring. Use a sharp blade to guide expansion where you want it. This is essential for a good oven spring in gluten free sourdough bread.
My Bread Tastes Too Sour or Not Sour Enough
Taste is personal, but the fermentation process controls your loaf’s tang.
To increase sourness:
- Let your preferment ferment for 12–18 hours
- Use a lower percentage of starter and extend proof time
- Cold proof overnight in the fridge to slow fermentation and develop flavor
To reduce sourness:
- Shorten preferment time to 4–6 hours
- Use a slightly higher ratio of starter to speed up fermentation
- Avoid letting dough sit too long during proof
Flavor isn’t only about fermentation—it’s also affected by flour. For a milder taste, stick with sorghum, brown rice, or millet. Want bolder, earthy notes? Try buckwheat or teff in your next gluten free sourdough bread blend.
Curious how flour impacts flavor in sweet treats? Try our gluten-free German chocolate cake for a unique dessert experience that also relies on balance and structure.
Quick Troubleshooting Table
| Problem | Likely Cause | Recommended Fix |
|---|---|---|
| Gummy texture | Underbaked, too wet, sliced too early | Bake longer, cool completely, adjust water |
| Flat or dense loaf | Weak starter, under-proofed or over-proofed | Feed starter twice, monitor proof carefully |
| Too sour | Overfermentation | Shorten preferment or proofing time |
| Not sour enough | Too quick fermentation | Extend preferment, refrigerate overnight |
By mastering these adjustments, your gluten free sourdough bread will become more consistent with every bake. Troubleshooting isn’t failure—it’s part of the learning process.
Storing, Slicing & Serving Suggestions
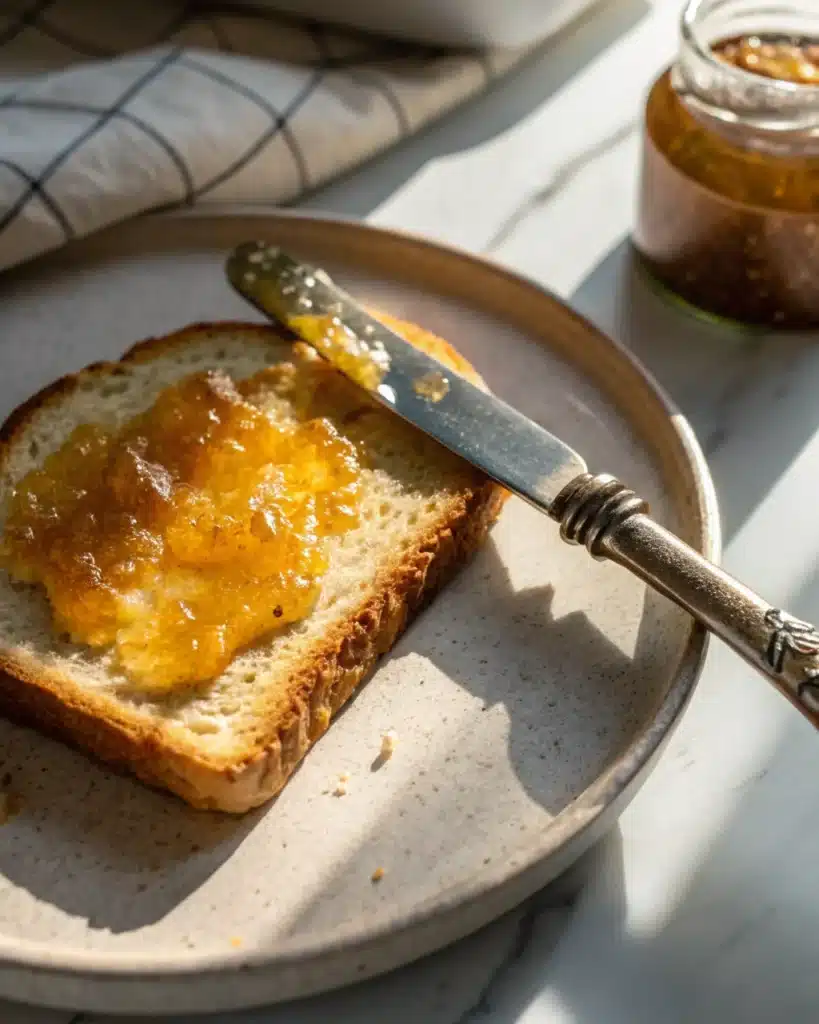
Best Ways to Store Gluten-Free Sourdough Bread
After all the time and care you’ve put into baking your gluten free sourdough bread, don’t let it go to waste by storing it the wrong way. Because gluten-free loaves tend to lose moisture faster than wheat bread, proper storage is essential for keeping texture and flavor intact.
Here are the best storage options:
For same-day or next-day use:
- Wrap the cooled loaf in a clean tea towel or place in a linen bread bag
- Leave it at room temperature in a dry place
For 2–3 day freshness:
- Store in an airtight container, but crack the lid slightly to allow airflow
- Avoid plastic bags unless you’re in a very dry climate—they trap moisture and soften the crust
For long-term storage:
- Slice the loaf first
- Wrap slices in parchment paper and freeze in a ziplock bag
- Toast slices directly from frozen—no need to thaw
If you plan to serve your gluten free sourdough bread over multiple days, freezing individual slices is the best way to maintain that chewy interior and crispy crust.
Need more tips on storing gluten-free baked goods? Check out our gluten-free biscuits and gravy—they hold up beautifully with the right storage, too.
How to Slice Without Crushing Your Loaf
Gluten-free loaves, especially those with a soft crumb and high hydration, can be delicate right after baking. That’s why cooling and slicing properly is just as important as mixing or proofing.
Here’s how to get clean, beautiful slices:
- Cool completely: Let your bread rest for at least 90 minutes—longer if it’s a thick loaf
- Use a serrated bread knife: Avoid sawing; use long, smooth strokes
- Cut from the center: This keeps the loaf more stable and prevents crumbling
- If crumb is too soft: Refrigerate the loaf for 30 minutes before slicing
A good knife and proper cooling will prevent you from crushing the loaf and preserve the texture of your gluten free sourdough bread.
For a simple side that pairs perfectly with warm bread, don’t miss our gluten-free pancake recipe. It’s another comfort food favorite done right.
Serving Ideas: From Breakfast to Dinner
Now the fun part—enjoying your gluten free sourdough bread! Thanks to its tangy flavor and chewy texture, this bread is incredibly versatile and pairs well with both sweet and savory meals.
Breakfast:
- Toast with almond butter and banana
- Avocado toast with hemp seeds and chili flakes
- French toast using day-old slices
Lunch:
- Grilled cheese with tomato and basil
- Turkey and cranberry sandwich on pan-toasted slices
- Open-faced hummus and roasted veggie tartine
Dinner:
- Garlic bread with gluten-free pasta
- Sourdough croutons for soups or salads
- Rustic bruschetta with balsamic tomatoes
Entertaining tip: Slice your loaf into cubes, bake until crisp, and serve with dips or spreads for a gluten-free appetizer board.
Whether you’re eating it fresh, toasted, or turned into croutons, your homemade gluten free sourdough bread is more than just a recipe—it’s the foundation for countless meals.
Conclusion: Final Thoughts on Mastering Gluten Free Sourdough Bread
Baking gluten free sourdough bread may feel intimidating at first—but with the right starter, flours, hydration, and techniques, anyone can create loaves that rival even the finest artisan bakeries. You’ve now got every step covered: from building a reliable starter and shaping a strong dough, to troubleshooting dense crumbs or boosting sour flavor.
When you make your own bread at home, you control the ingredients, flavor, and texture—no fillers, no weird gums, and definitely no price markup. Whether you’re toasting slices for breakfast, crafting the perfect sandwich, or turning leftovers into garlic croutons, gluten free sourdough bread is the cornerstone of a delicious, healthy, and versatile gluten-free kitchen.
Follow us on Facebook & Pinterest for more gluten-free dessert ideas and community fun!
For more delicious gluten-free recipes, visit our website at The Savory Hearth.
PART 9: FAQs – Answering Common Questions
Are Any Sourdough Breads Gluten-Free?
Most traditional sourdough breads are not gluten-free. While fermentation can reduce gluten levels, it doesn’t eliminate them entirely. For individuals with celiac disease or gluten sensitivity, only recipes made specifically with gluten free flours and a gluten free sourdough starter are safe.
When made correctly, gluten free sourdough bread is just as tangy, chewy, and satisfying as the classic version—but without the gluten-related side effects.
Which Gluten-Free Flour Is Best for Sourdough?
There’s no single best flour, but some perform better than others. For structure and flavor, bakers often use a mix of:
Brown rice flour
Sorghum flour
Millet
Quinoa or buckwheat (for bold flavor)
These flours feed the starter well and help your gluten free sourdough bread rise properly while maintaining texture. Starches like tapioca and potato are great for lightness and softness.
Why Is Gluten-Free Bread So Small and Expensive?
Two main reasons: ingredient cost and structural limitations.
Gluten-free flours tend to be more expensive, and you often need multiple types to mimic the performance of wheat flour. Also, without gluten, the dough doesn’t hold as much gas, making loaves smaller unless carefully handled.
When you bake gluten free sourdough bread at home, you skip the premium price tag and get larger, fresher loaves with better texture and flavor.
Looking for affordable homemade recipes? Try our gluten-free chocolate cupcakes to balance out your bread-making batch days.
The Ultimate Gluten Free Sourdough Bread | Crispy & Chewy Loaf -
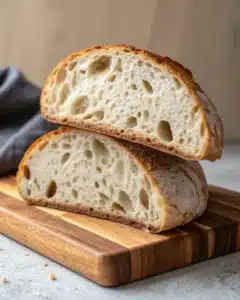
Master the perfect gluten free sourdough bread! Our easy recipe gives you a beautifully tangy loaf with a chewy, airy interior and a satisfyingly crispy crust.
Type: Bread
Cuisine: Americain
Keywords: gluten free sourdough bread, gluten-free bread, homemade sourdough, gluten free starter, no gum bread
Recipe Yield: 1 medium loaf
Calories: ~180 kcal
Preparation Time: PT20M
Cooking Time: PT1H10M
Total Time: PT1H30M
Recipe Ingredients:
- 200g brown rice flour
- 100g sorghum flour
- 100g millet flour
- 100g tapioca starch
- 10g salt
- 240g active gluten-free sourdough starter
- 400g warm filtered water
- 20g whole psyllium husk
- Optional: 1 tbsp honey or maple syrup
- Optional: herbs, seeds, or spices for added flavor
Recipe Instructions:
Make Psyllium Gel:
Prepare Dry Ingredients:
Combine Wet and Dry Ingredients:
Rest and Shape the Dough:
Proof the Dough:
Preheat the Oven:
Score the Dough:
Bake the Bread:
Cool Completely:

1 thought on “Gluten Free Sourdough Bread: The Ultimate Guide for Delicious Homemade Loaves”